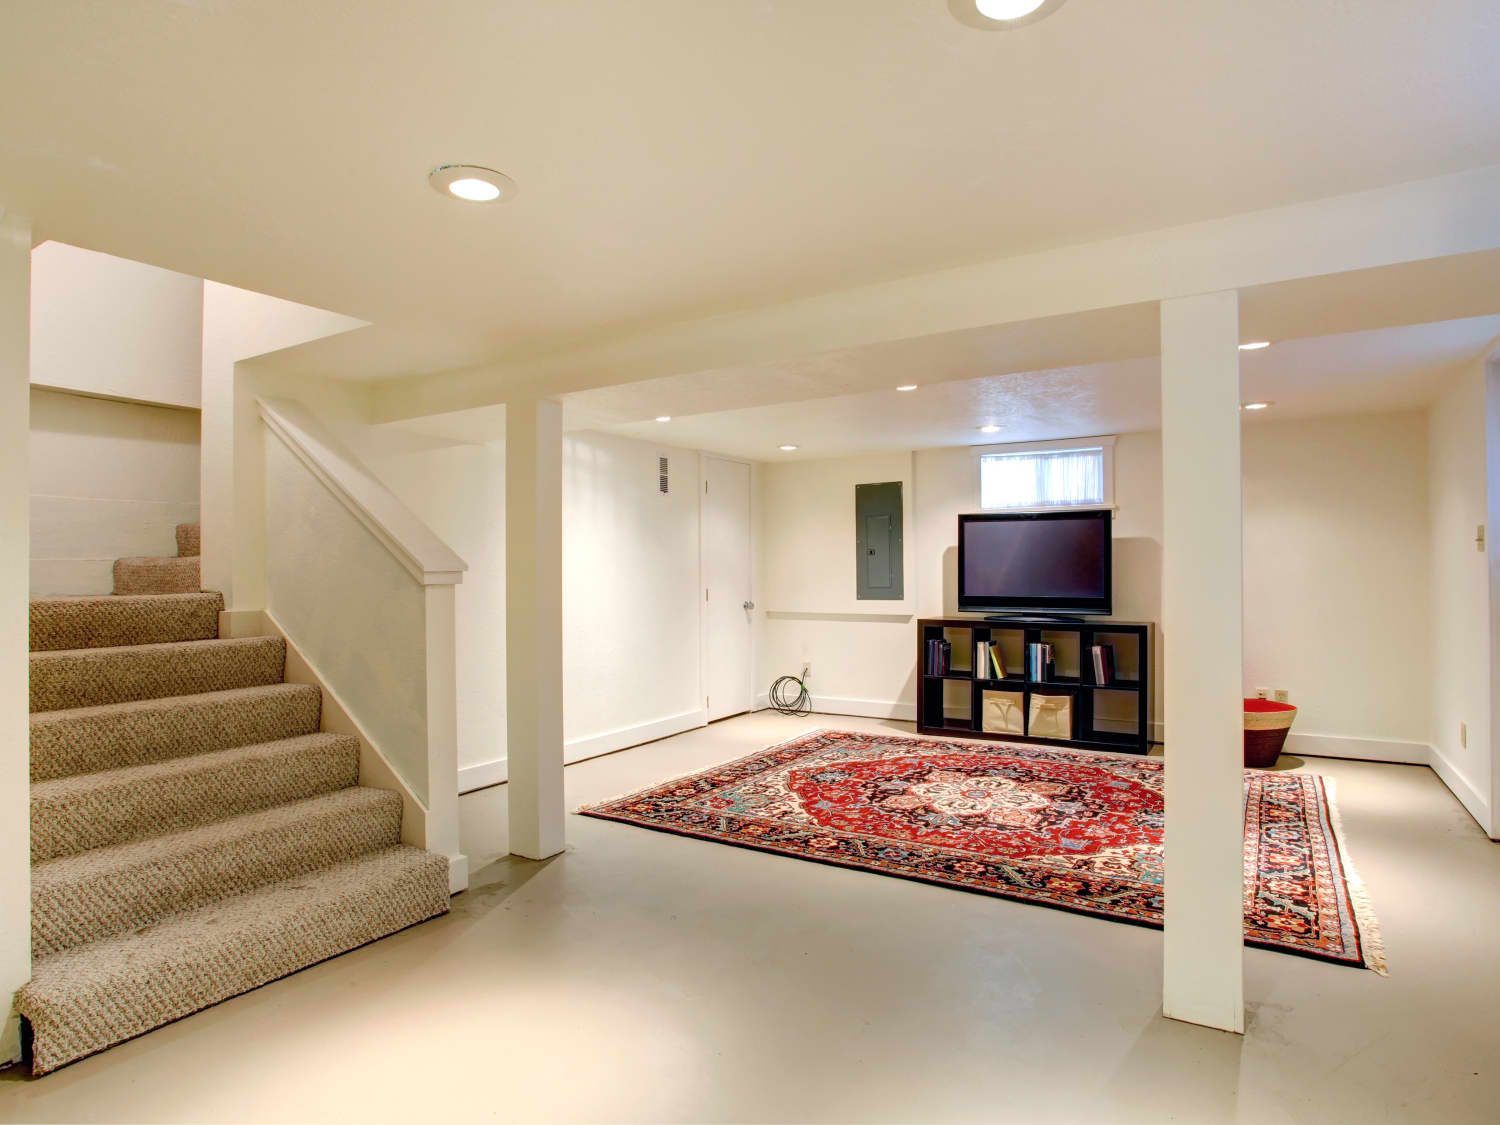
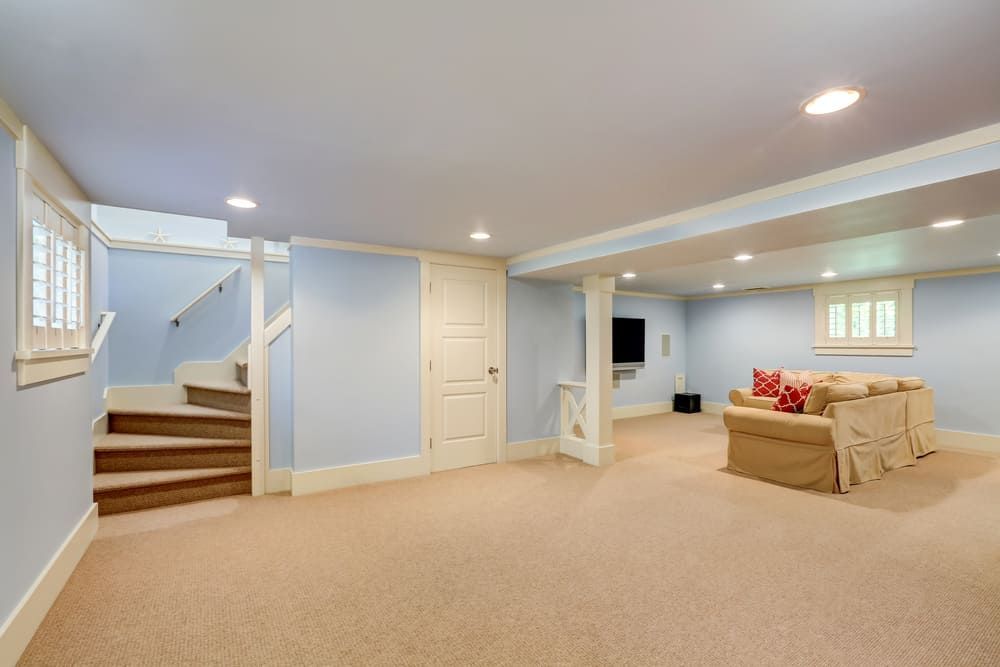
How to Dispose of Carpet in Rhode Island

David Antonucci • October 26, 2025

Replacing old carpet is one of the most impactful home improvements you can make, instantly refreshing your Rhode Island home's appearance and feel. However, the satisfaction of new flooring quickly turns to frustration when you're faced with disposing of the old carpet. Unlike regular household trash, carpet can't simply go out with your weekly garbage pickup. Rhode Island homeowners need practical, legal, and cost-effective disposal solutions for this bulky material.


Carpet Disposal in Rhode Island Requires Special Handling


Rhode Island municipalities have strict regulations about what can be placed at the curb for regular trash collection. Carpet falls into the category of bulky waste that requires special disposal arrangements due to its size, weight, and material composition.


Rhode Island carpet disposal challenges include:


Volume and weight make carpet extremely bulky and heavy, especially when rolled. A single room's worth of carpet can weigh 100 to 200 pounds or more depending on padding, backing type, and carpet density. Multiple rooms quickly become unmanageable for standard disposal methods.


Municipal restrictions prevent curbside pickup in most Rhode Island communities. Cities and towns including Providence, Warwick, Cranston, Pawtucket, and East Providence don't accept carpet through regular trash collection. Some municipalities offer limited bulk pickup services but with significant restrictions on size, scheduling, and quantity.


Transfer station limitations at many Rhode Island facilities include specific requirements for carpet disposal. Some charge premium rates for carpet due to disposal challenges, while others require carpet to be cut into specific sizes or have minimum/maximum length restrictions.


Environmental concerns surrounding carpet disposal have increased scrutiny on proper handling. Carpet contains various materials including synthetic fibers, adhesives, and backing that require appropriate disposal to prevent environmental contamination.


These factors mean Rhode Island homeowners can't simply drag old carpet to the curb and forget about it. You need a thoughtful disposal plan before your carpet removal project begins.


Understanding Rhode Island Carpet Disposal Regulations


Before disposing of carpet in Rhode Island, familiarize yourself with state and local regulations to avoid fines and ensure legal compliance.


Rhode Island state regulations classify carpet as solid waste requiring proper disposal at licensed facilities. The Rhode Island Department of Environmental Management (RIDEM) oversees waste disposal regulations, ensuring materials end up at appropriate facilities rather than being illegally dumped.


Municipal regulations vary across Rhode Island communities:


Providence residents cannot place carpet at the curb for regular collection. The city's Department of Public Works occasionally offers special bulk waste collection events, but carpet may not always be accepted. Transfer station access requires proof of residency and carpet disposal fees apply.


Warwick has similar restrictions with no curbside carpet pickup through standard trash services. The transfer station accepts carpet from residents with proper identification, charging by weight or volume. Carpet must sometimes be cut into manageable pieces for acceptance.


Cranston, Pawtucket, East Providence, Woonsocket, and other Rhode Island municipalities generally prohibit carpet in regular trash collection. Most operate transfer stations with varying carpet acceptance policies, hours, and fees. Always call ahead to confirm current carpet disposal policies before making a trip.


Transfer station carpet requirements often include:


  • Cutting carpet into strips no wider than 3 to 4 feet
  • Rolling pieces rather than folding to prevent excessive bulk
  • Removing all nails, tack strips, and staples from carpet backing
  • Separating carpet padding from carpet itself
  • Proof of residency within the municipality
  • Payment of disposal fees based on weight or volume


Violating carpet disposal regulations in Rhode Island can result in fines ranging from $100 to $500 or more for illegal dumping. The hassle and expense of non-compliance far exceed the cost of proper disposal.


DIY Carpet Disposal at Rhode Island Transfer Stations


Taking carpet to your local Rhode Island transfer station yourself is possible but involves significant effort and challenges.


The DIY carpet disposal process includes:


Removing carpet from your home requires substantial physical labor. You'll need to pull up carpet from tack strips along walls, remove staples from padding, roll carpet into manageable sections, and carry heavy rolls to your vehicle. A typical bedroom produces a carpet roll weighing 75 to 150 pounds that's awkward to maneuver through doorways and down stairs.


Cutting carpet to meet transfer station requirements adds time and effort. Most facilities require carpet in strips 3 to 4 feet wide, meaning you'll need a sharp utility knife, a straight edge, and patience to cut through tough carpet backing. This process is dusty, physically demanding, and time-consuming.


Transportation challenges arise because carpet rolls don't fit in standard vehicles. You'll need a pickup truck, cargo van, or trailer to haul carpet. If you don't own such a vehicle, rental costs $75 to $150 per day in Rhode Island, immediately diminishing any cost savings from DIY disposal.


Transfer station fees in Rhode Island vary by municipality but typically range from $60 to $120 per ton or $40 to $80 per pickup truck load. Some facilities charge extra for carpet specifically due to disposal difficulties. You'll also need to factor in fuel costs, time spent loading and unloading, and the physical toll of heavy lifting.


DIY carpet disposal costs for a typical Rhode Island home:


  • Single bedroom (approximately 150 square feet): $50 to $80 including disposal fees, fuel, and vehicle rental if needed
  • Multiple bedrooms (approximately 500 square feet): $100 to $200 including multiple trips, disposal fees, fuel, and vehicle rental
  • Whole house (approximately 1,500 square feet): $250 to $450 including numerous trips, disposal fees, extended vehicle rental, and significant time investment


Hidden costs of DIY carpet disposal include:


  • Physical exhaustion from hours of heavy lifting and awkward maneuvering
  • Risk of injury to your back, knees, or hands from handling heavy, sharp-edged materials
  • Time investment of 4 to 12+ hours depending on project size
  • Vehicle wear and tear from overloading with heavy materials
  • Potential for multiple trips if you underestimate volume or don't have adequate vehicle capacity


While DIY disposal initially seems economical, the total costs often approach or exceed professional disposal methods when you account for all expenses and value your time appropriately.


Full-Service Junk Removal for Carpet Disposal in Rhode Island


Full-service junk removal companies offer convenient carpet disposal by handling all physical labor, transportation, and disposal for you. In Rhode Island, these services provide hassle-free solutions but at premium prices.


How full-service carpet removal works:


You schedule an appointment with a Rhode Island junk removal company and they arrive at your home with a truck and crew. You show them which carpet needs removal, and their team pulls up the carpet, removes padding, cuts materials into transportable pieces, carries everything to their truck, and hauls it away for disposal. The entire process typically takes 1 to 3 hours depending on the amount of carpet.


Rhode Island full-service carpet removal pricing:


  • Single room (150 square feet or less): $150 to $250
  • Two to three rooms (300 to 500 square feet): $250 to $400
  • Whole house (1,000 to 1,500 square feet): $450 to $700+
  • Additional charges may apply for difficult access, multiple stories without elevator access, or carpet in poor condition


Advantages of full-service carpet removal: No physical labor required on your part makes this ideal for elderly Rhode Island residents, those with physical limitations, or anyone who simply prefers not to do heavy lifting. The convenience factor is substantial - you don't lift a finger while professionals handle everything.


Fast completion means carpet disappears quickly without disrupting your home for days. Most jobs finish in hours rather than the multiple days DIY removal might require.


No vehicle rental or transportation concerns since the company brings their own truck and handles all hauling. Your personal vehicles remain safe and available for other uses.


Disadvantages of full-service carpet removal: High cost makes this the most expensive carpet disposal option, often costing 2 to 3 times more than dumpster rental for equivalent carpet volume. The convenience premium can be $200 to $400 or more for larger projects.


Scheduling constraints require working within the company's availability, which may not align with your renovation timeline. Peak seasons can mean waiting days or weeks for service.


Less control over the process since you're relying on the company's schedule and methods. If you're coordinating with flooring installers or other contractors, this lack of flexibility can complicate project management.


Pricing uncertainty until they see the carpet in person, as most companies provide only rough estimates over the phone. The final bill can exceed initial quotes if they determine the job is more complex than described.


When full-service makes sense for Rhode Island carpet disposal:


  • You're removing carpet from a single small room
  • You have physical limitations preventing heavy lifting
  • You need immediate removal and money isn't your primary concern
  • The carpet is in an extremely difficult location like a third-floor walkup
  • You're elderly or have no one available to help with physical labor


For most Rhode Island carpet disposal projects, especially those involving multiple rooms or whole-house renovations, full-service removal is cost-prohibitive relative to the value it provides.


Dumpster Rental for Rhode Island Carpet Disposal


For the vast majority of Rhode Island carpet removal projects, dumpster rental offers the ideal combination of affordability, convenience, and flexibility. A dumpster placed at your property lets you work at your own pace while eliminating transportation hassles and providing ample space for carpet and related renovation debris.


Why dumpster rental excels for carpet disposal:


All-inclusive pricing provides budget certainty with no surprise charges. You know upfront exactly what you'll pay, including delivery, pickup, disposal, and substantial weight allowance. This transparency makes planning simple and prevents the cost creep common with other disposal methods.


Multi-day rental periods give you flexibility to remove carpet according to your schedule rather than rushing to finish in a single exhausting day. Standard rental periods of up to 7 days allow you to coordinate with flooring installers, work around your job schedule, and avoid the physical strain of marathon removal sessions.


Capacity for carpet plus related debris means you can dispose of carpet, padding, tack strips, old flooring underlayment, and any other renovation waste in a single container. This comprehensive solution eliminates the need for multiple disposal arrangements.


No transportation costs or vehicle damage risk since the dumpster comes to your property and the rental company handles all hauling. Your vehicles stay clean and safe while accommodating your entire project's waste.


Work at your own pace without pressure from company schedules or time constraints. Pull up carpet room by room, take breaks when needed, and avoid the physical exhaustion of trying to complete everything in one day.


15 Yard Dumpster: Small to Medium Carpet Removal Projects


Dimensions: 12' L x 7.6' W x 4.6' H
Capacity: 15 cubic yards
Price: $475 including 2 tons, up to 7 days rental


The 15 yard dumpster is ideal for single-room to multi-room carpet removal projects in Rhode Island homes. This size provides ample capacity for most residential carpet disposal needs while fitting easily in standard driveways.


Ideal for these Rhode Island carpet removal scenarios:


  • Single bedroom carpet removal (150 to 200 square feet)
  • Two to three bedroom carpet removal (400 to 600 square feet)
  • Living room and hallway carpet removal
  • Apartment or condo carpet removal
  • Small home carpet replacement projects


Capacity guidelines for the 15 yard dumpster:


A 15 yard dumpster comfortably holds approximately 500 to 800 square feet of residential carpet including standard padding. To put this in perspective, that's enough for 3 to 5 average bedrooms or a living room, dining room, and hallway combined.


The 2-ton (4,000 pound) weight allowance is typically more than sufficient for carpet and padding from this square footage. Standard residential carpet with padding weighs approximately 4 to 6 pounds per square foot, meaning 800 square feet weighs roughly 3,200 to 4,800 pounds. While this approaches or slightly exceeds the included weight, carpet is relatively compressible and the overage charges ($140 per additional ton) remain far less expensive than alternative disposal methods.


Cost comparison example: Three-bedroom carpet removal in Warwick (approximately 600 square feet)


DIY transfer station disposal would require multiple trips since 600 square feet of carpet creates very bulky rolls even when cut to regulation widths. Assuming 3 trips at $70 each for disposal ($210), $25 in fuel, $100 for a one-day truck rental since your car won't accommodate rolled carpet, and 8 hours of labor valued at $25/hour ($200), you're looking at $535 total - plus significant physical strain and time.


Full-service junk removal for this volume would typically require a half to three-quarter truck load, costing approximately $350 to $500 with most Rhode Island companies.


A 15 yard dumpster rental at $475 saves $60 to $125 compared to alternatives while providing superior convenience. You work at your own pace over several days, avoid the back-and-forth of transfer station trips, and can dispose of tack strips, transition pieces, and other renovation debris simultaneously.


The 15 yard dumpster is the best choice when:


  • Your carpet removal involves 500 to 800 square feet or less
  • You're renovating 1 to 4 rooms in your Rhode Island home
  • You want to work gradually over several days rather than rushing
  • You're comfortable with basic physical work of pulling up carpet and loading it
  • You have driveway or street space for placement
  • You want predictable, all-inclusive pricing


Rhode Island homeowners in Providence, Cranston, Pawtucket, East Providence, and other urban areas particularly appreciate the 15 yard dumpster's compact footprint, which fits easily in most residential driveways without blocking street access.


20 Yard Dumpster: Large Carpet Removal Projects


Dimensions: 14' L x 8' W x 6.5' H
Capacity: 20 cubic yards
Price: $540 including 2 tons, up to 7 days rental


The 20 yard dumpster provides the best value for whole-house carpet removal or when you're combining carpet disposal with other renovation debris. Despite costing only $65 more than the 15 yard option, you gain 33% more capacity - an exceptional value proposition.


Ideal for these Rhode Island carpet removal scenarios:


  • Whole-house carpet removal (1,000 to 1,500+ square feet)
  • Multiple-floor carpet removal in two-story homes
  • Carpet removal combined with renovation debris disposal
  • Estate cleanouts where carpet removal is part of larger property clearing
  • Foreclosure or rental property renovation projects
  • Commercial carpet removal from small Rhode Island businesses


Capacity guidelines for the 20 yard dumpster:


A 20 yard dumpster easily accommodates 1,000 to 1,500 square feet of residential carpet including padding. This capacity covers most whole-house carpet removal projects in Rhode Island's typical single-family homes, including all bedrooms, living spaces, and hallways.


The additional volume becomes particularly valuable when you're disposing of more than just carpet. If your renovation includes removing old baseboards, transition strips between rooms, damaged subfloor sections, or other construction debris, the 20 yard dumpster handles everything in one container.


Cost comparison example: Whole-house carpet removal in Cranston (approximately 1,200 square feet)


DIY transfer station disposal would be extremely challenging for this volume. You'd need approximately 5 to 7 trips to dispose of 1,200 square feet of carpet, even when properly cut and rolled. Calculating conservatively at $80 per trip ($560), $40 in fuel costs, $200 for a two-day truck rental since you can't complete this in one day, and 16+ hours of labor valued at $25/hour ($400), your total reaches $1,200 - not counting the physical exhaustion and risk of injury from handling such volumes.


Full-service junk removal for whole-house carpet typically requires a full truck load or possibly multiple trips, costing $550 to $800+ with Rhode Island companies depending on specific volume and access difficulty.


A 20 yard dumpster rental at $540 saves $10 to $660 compared to alternatives while offering vastly superior convenience and flexibility. You can coordinate carpet removal with your flooring installer's schedule, work room by room over several days, and avoid the marathon physical effort required by other methods.


The 20 yard dumpster is the best choice when:


  • Your carpet removal involves 800 to 1,500+ square feet
  • You're renovating an entire Rhode Island home's flooring
  • You're combining carpet disposal with other renovation waste
  • You want maximum flexibility in timing and pacing
  • You have adequate space for the slightly larger container
  • You want the best value per cubic yard of disposal capacity


Many Rhode Island homeowners initially think they need a 15 yard dumpster but quickly realize they underestimated their carpet volume or want space for additional renovation debris. Since the 20 yard option costs only $65 more, choosing the larger size provides valuable insurance against running out of space.


Preparing Carpet for Dumpster Disposal in Rhode Island


While dumpster rental eliminates most disposal headaches, properly preparing carpet makes loading easier and more efficient.


Removing carpet from your Rhode Island home:


Start at a corner by pulling the carpet free from tack strips along the wall. Carpet typically attaches to wooden tack strips with small nails that grip the backing. Use pliers to get a good grip on the corner and pull firmly upward and away from the wall. Once you've freed a section, you can usually pull the rest by hand, working your way across the room.


Cut carpet into manageable sections using a sharp utility knife. Rather than trying to remove an entire room's carpet as one piece, cut it into strips 3 to 4 feet wide. This makes rolling and carrying much easier. Cut from the back of the carpet rather than the face to protect your blade and create cleaner cuts.


Roll carpet sections tightly to minimize volume in your dumpster. Tight rolls take up significantly less space than loosely folded carpet. As you roll, compress the carpet as much as possible. You can use rope or old extension cords to secure rolls and prevent them from unrolling during transport to the dumpster.


Remove carpet padding separately from the carpet itself. Padding is usually stapled to the subfloor and can be pulled up and rolled after removing the carpet. Some Rhode Island homeowners find padding easier to handle than carpet since it's generally lighter and more flexible.


Remove tack strips, transition pieces, and nails from the perimeter. These wooden strips with protruding nails can be pulled up with a pry bar or hammer. While you can dispose of tack strips in your dumpster along with carpet, removing them first makes carpet removal easier and prevents injuries from exposed nails.


Loading carpet efficiently into your dumpster:


Place rolled carpet sections vertically when possible to maximize space. Standing rolls on end like columns uses dumpster depth efficiently and creates gaps where you can place padding, tack strips, and other debris.


Break down cardboard boxes flat and use them to fill gaps between carpet rolls. If you have moving boxes or other cardboard from your renovation project, flattening them and sliding them into spaces between carpet rolls maximizes dumpster capacity.


Distribute weight evenly throughout the dumpster rather than loading all heavy items on one end. This prevents tipping concerns and makes pickup easier for the rental company.


Don't overfill above the dumpster's top edge. For safety and legal reasons, materials should stay level with or below the container's sides. Overfilled dumpsters may require partial unloading before pickup, wasting your time and effort.


Combining Carpet Disposal with Other Rhode Island Renovation Projects


One of the biggest advantages of dumpster rental is the ability to dispose of multiple project wastes simultaneously, maximizing value and efficiency.


Common items Rhode Island homeowners dispose of alongside carpet:


Old flooring materials including hardwood, laminate, vinyl, or tile you're replacing after carpet removal. If you're transitioning from carpet to other flooring types, the dumpster accommodates both old carpet and the previous flooring underneath.


Baseboards and trim that need replacement after carpet removal. Pulling up carpet often damages baseboards or reveals gaps where trim no longer fits properly with new flooring. Disposing of old trim along with carpet simplifies your renovation.


Drywall and construction debris if you're doing more extensive renovation work. Many Rhode Island homeowners replace carpet as part of larger room renovations that include wall repairs, closet modifications, or other improvements. A dumpster handles all this debris together.


Furniture you no longer need after redecorating with new carpet and fresh spaces. Room transformations often inspire purging old furniture that no longer fits your vision. Rather than arranging separate furniture disposal, toss it in the dumpster along with old carpet.


Renovation supplies packaging including boxes, plastic wrapping, and packing materials from your new carpet, flooring, or other purchased materials. These wastes accumulate quickly during renovations and fit easily in your dumpster's remaining space.


Prohibited items to keep out of your dumpster:


Hazardous materials including paint, chemicals, solvents, or motor oil cannot go in dumpsters. Rhode Island has specific disposal requirements for these items through hazardous waste collection programs.


Electronic waste like old televisions, computers, or appliances with refrigerants require special recycling. Many Rhode Island municipalities and retailers offer e-waste recycling programs.


Liquid waste of any kind is prohibited in dumpsters. Drain all containers and dispose of liquids through proper channels before placing containers in your dumpster.


By maximizing your dumpster's capacity with multiple project wastes, you reduce the effective cost per disposed item and simplify your overall renovation logistics.


Timing Your Rhode Island Carpet Disposal Project


Strategic timing makes carpet removal and disposal smoother and more efficient.


Coordinating with flooring installation:


Schedule dumpster delivery 1 to 2 days before carpet removal begins. This ensures the container is on-site when you start working, allowing immediate disposal rather than creating piles of old carpet in your garage or yard.


Complete carpet removal before new flooring installation. Your flooring installers should arrive to a clean, carpet-free surface ready for new materials. Having the dumpster on-site during this transition prevents scheduling conflicts and rushed work.


Keep the dumpster through initial new flooring installation if possible. New flooring generates packaging waste, cut pieces, and other debris that can go directly into your dumpster, ensuring a clean job site throughout the project.


Schedule pickup for 1 to 2 days after completing your entire flooring project. This buffer ensures you've disposed of all project waste before the dumpster leaves.


Seasonal considerations in Rhode Island:


Spring and summer (April through September) offer ideal weather for carpet removal projects. Rhode Island's pleasant weather during these months makes working easier, and longer daylight hours give you more time to work each day. However, this is peak season for dumpster rentals, so book 2 to 3 weeks ahead to ensure availability.


Fall (October and November) provides comfortable working temperatures and good availability. This is an excellent time for flooring projects in Rhode Island, with less demand for rentals than spring and summer.


Winter (December through March) can complicate outdoor projects but offers maximum availability and flexibility for scheduling. If you're doing interior carpet replacement, winter timing works fine. Just ensure clear access to the dumpster despite snow and ice, and account for shorter daylight hours when planning your work schedule.


Project duration planning:


Most Rhode Island homeowners complete carpet removal for an average-sized home (3 to 4 bedrooms) in 2 to 4 days when working a few hours each day. This assumes you're working around normal schedules and taking reasonable breaks.


The 7-day standard rental period provides ample time for nearly any residential carpet project. You can work methodically without rush, coordinate with contractors on their schedules, and accommodate unexpected delays from weather or schedule conflicts.


Additional days beyond 7 cost only $8 per day if you need extra time, though most Rhode Island carpet projects complete well within the standard period.


Cost Analysis: Rhode Island Carpet Disposal Scenarios


Understanding costs through real-world examples helps you budget appropriately for your carpet disposal project.


Scenario 1: Single bedroom carpet removal in Providence (200 square feet)


DIY Method: 1-2 transfer station trips at $70 each ($140), $15 fuel, $75 truck rental for half-day, 4 hours labor at $25/hour ($100) = $330 total


Full-Service: Small room removal = $150 to $250


15 Yard Dumpster: $475 with room for additional debris


Winner: Full-service junk removal narrowly beats dumpster rental for very small single-room projects, though dumpster offers better value if you have any additional disposal needs.


Scenario 2: Three-bedroom apartment carpet removal in Warwick (600 square feet)


DIY Method: 3 transfer station trips at $75 each ($225), $25 fuel, $100 truck rental, 8 hours labor at $25/hour ($200) = $550 total


Full-Service: Half to three-quarter truck load = $350 to $500


15 Yard Dumpster: $475


Winner: 15 yard dumpster saves $0 to $125 depending on full-service company and provides superior flexibility.


Scenario 3: Full house carpet removal in Cranston (1,200 square feet)


DIY Method: 6 transfer station trips at $80 each ($480), $40 fuel, $200 for two-day truck rental, 16 hours labor at $25/hour ($400) = $1,120 total


Full-Service: Full truck load or multiple trips = $550 to $800


20 Yard Dumpster: $540


Winner: 20 yard dumpster saves $10 to $580 while offering maximum convenience and flexibility.


Scenario 4: Estate property carpet removal in Pawtucket (1,800 square feet across two floors)


DIY Method: 8+ transfer station trips at $80 each ($640), $50 fuel, $300 for three-day truck rental, 20+ hours labor at $25/hour ($500) = $1,490 total


Full-Service: Multiple truck loads = $800 to $1,200+


20 Yard Dumpster: $540, possibly with additional weight charges if carpet is particularly heavy ($680 total with one additional ton)


Winner: 20 yard dumpster saves $120 to $710 even with potential overage charges.


These real-world scenarios demonstrate that dumpster rental consistently provides the most cost-effective Rhode Island carpet disposal for projects involving 400+ square feet of carpet.


Environmental Responsibility in Rhode Island Carpet Disposal


Proper carpet disposal isn't just about convenience and cost - it's also about protecting Rhode Island's environment.


Carpet recycling challenges:


Carpet is notoriously difficult to recycle due to its composite construction with multiple materials including synthetic fibers, latex or polyurethane backing, and various adhesives. Traditional recycling facilities can't easily separate these components, leading most carpet to end up in landfills.


Some specialized carpet recycling facilities exist, but Rhode Island doesn't currently have widespread carpet-specific recycling infrastructure. The nearest facilities capable of processing carpet materials are often in neighboring states, making transportation economically and logistically impractical for residential quantities.


Responsible disposal practices:


While recycling may be limited, responsible disposal still matters. Using licensed waste management services ensures your carpet ends up at proper disposal facilities rather than being illegally dumped in Rhode Island's forests, waterways, or vacant properties.


Reputable dumpster rental companies like those serving Rhode Island follow all state environmental regulations and use licensed disposal facilities. This compliance protects the environment and ensures you're not inadvertently contributing to illegal dumping.


Extending carpet life reduces disposal needs:


Before removing carpet, consider whether professional cleaning might extend its useful life. Sometimes carpet that appears worn or stained can be revitalized with deep cleaning, delaying replacement and reducing waste.


If your carpet is in decent condition but no longer suits your needs, consider donating it to organizations that accept building materials for reuse. While this is less common for used carpet than for other materials, some Rhode Island contractors or DIYers might use it for workshops, garages, or other applications where appearance is secondary to function.


Minimizing future carpet waste:


When selecting new flooring, consider longevity and maintenance requirements. Higher-quality carpet with proper care lasts longer, reducing disposal frequency. Alternatively, consider hard flooring options like engineered hardwood, luxury vinyl plank, or tile that can last decades with minimal maintenance.


Special Situations: When Standard Carpet Disposal Gets Complicated


Some Rhode Island carpet removal projects present unique challenges requiring modified approaches.


Water-damaged or moldy carpet:


Carpet affected by Rhode Island's occasional flooding, basement water seepage, or plumbing failures requires careful handling. Water-damaged carpet can be extremely heavy - up to twice the weight of dry carpet - potentially exceeding your dumpster's weight allowance.


Moldy carpet presents health risks during removal. Wear protective equipment including an N95 mask, gloves, and eye protection when handling moldy materials. Bag particularly contaminated sections in heavy plastic before placing them in your dumpster to prevent mold spore spread.


Consider professional remediation services for severe mold situations. While more expensive, professionals have proper equipment and expertise to handle hazardous conditions safely.


Commercial carpet in Rhode Island businesses:


Commercial carpet tile and sheet goods often have different backing systems than residential carpet, sometimes making them heavier or more difficult to remove. The larger volumes from commercial spaces may require a 20 yard dumpster or even multiple rentals.


Business owners should verify their Rhode Island commercial lease requirements regarding flooring disposal. Some leases specify disposal methods or require proof of proper disposal for security deposit return.


Glued-down carpet:


Some Rhode Island homes, particularly those with concrete slab foundations, have carpet glued directly to the floor rather than installed over padding and tack strips. Removing glued carpet requires significantly more effort, often necessitating floor scrapers and adhesive solvents.


The backing often tears away from the carpet face during removal, creating twice the volume of debris. Budget extra dumpster space for glued carpet projects and expect longer removal timeframes.


Historic Rhode Island homes:


Older Rhode Island homes sometimes have multiple carpet layers installed over decades. Discovering original hardwood underneath makes the extra removal effort worthwhile, but multiple carpet layers quickly fill dumpsters.


Historic home renovations may face additional regulations in designated historic districts throughout Rhode Island cities like Newport and Providence. Verify local requirements before beginning work.


Maximizing Your Rhode Island Carpet Disposal Investment


Getting the most value from your dumpster rental requires some strategic planning.


Efficient loading techniques:


Roll carpet as tightly as possible to minimize volume. Loose rolls waste significant space. Consider walking on rolled sections to compress them further before placing in the dumpster.


Load longest, bulkiest items first to establish a base. Place rolled carpet sections vertically against the dumpster walls, then fill the center with additional rolls and padding.


Fill all gaps with smaller debris including tack strips, padding scraps, transition pieces, and other renovation waste. Think of it like a three-dimensional jigsaw puzzle where every cubic foot of space has value.


Break down any boxes or cardboard flat and use them to fill irregular spaces. Flattened cardboard slides easily between rolled carpet sections, maximizing space usage.


Avoiding common mistakes:


Don't wait until carpet removal is complete to start loading your dumpster. Load as you work, clearing space in your home and preventing garage or yard pile-up that creates additional handling later.


Don't mix prohibited items with acceptable waste. Hazardous materials, liquids, or electronics contaminate your dumpster load and may result in refusal of pickup or additional fees.


Don't overfill the dumpster above its top edge. While you want to maximize space, safety and legal requirements mandate keeping materials at or below the container's rim.


Don't forget about weight limits. While 2 tons accommodates most residential carpet projects, extremely heavy carpet or wet materials can exceed limits. If concerned about weight, discuss options with your rental company before loading.


Contingency planning:


Have a backup plan if you run out of dumpster space. This might include scheduling a second dumpster rental, arranging a single transfer station trip for remaining materials, or scheduling a pickup and second delivery if you're in the middle of a multi-week project.


Build in extra time before your deadline. If you have a hard deadline for project completion, schedule dumpster delivery with a buffer. Expecting to finish in 5 days? Schedule 7 to ensure you're not rushed.


Communicate with your rental company about project scope. If your project changes or expands, let them know early. They may be able to swap your 15 yard dumpster for a 20 yard or extend your rental period with advance notice.


Why Rhode Island homeowners choose Rockhouse Disposal:


Local expertise and reliability. As a Rhode Island-based company, we understand local regulations, transfer station requirements, and the unique challenges of carpet disposal across Providence, Warwick, Cranston, Pawtucket, East Providence, and communities throughout the state. We navigate these complexities so you don't have to.


Flexible service options. Whether you want to rent a dumpster and handle the work yourself or prefer our full-service junk removal team to manage everything, we offer solutions tailored to your needs and budget. Not sure which option is best? We're happy to discuss your specific project and recommend the most cost-effective approach.


Transparent, all-inclusive pricing. No hidden fees, no surprise charges, no fine print. Our quotes include everything except potential overages for extra weight or extended rental days - and we clearly communicate those rates upfront so you can budget accurately.


Convenient scheduling and placement. We work around your timeline, not the other way around. Need the dumpster delivered on a specific day to coordinate with your flooring installer? We'll make it happen. Have limited space and need guidance on optimal placement? Our experienced team will help you find the best solution.


Professional, courteous service. From your first phone call to final pickup, we treat every Rhode Island customer with respect and professionalism. We show up on time, place your dumpster carefully to avoid property damage, and ensure a smooth, hassle-free experience from start to finish.


Environmentally responsible disposal. We follow all Rhode Island environmental regulations and use licensed disposal facilities, giving you peace of mind that your old carpet is being handled properly and legally.


Getting Started with Your Rhode Island Carpet Disposal Project


Ready to dispose of old carpet and transform your Rhode Island home with beautiful new flooring? Here's how to get started with Rockhouse Disposal:


Step 1: Assess your carpet disposal needs. Measure the square footage of carpet you're removing by multiplying room length by width for each area. Add up the total to determine which dumpster size suits your project. As a rule of thumb, a 15 yard dumpster handles up to 800 square feet while a 20 yard accommodates 1,500+ square feet.


Step 2: Contact Rockhouse Disposal for a quote. Call or visit our website to discuss your project. We'll ask about your carpet square footage, whether you're disposing of just carpet or additional materials, your timeline, and your property location in Rhode Island. Based on this information, we'll recommend the best service option and provide transparent pricing.


Step 3: Schedule delivery or service. Once you've decided on dumpster rental or full-service junk removal, we'll schedule delivery or service for a date that works with your renovation timeline. For dumpster rentals, we'll discuss optimal placement locations considering driveway access, street placement regulations, and overhead clearances.


Step 4: Remove and dispose of your carpet. If you've rented a dumpster, proceed with carpet removal at your own pace over the included 7-day rental period. Pull up carpet, cut it into manageable sections, roll it tightly, and load it into your dumpster along with padding, tack strips, and any other renovation debris. If you've chosen full-service removal, simply meet our team at the scheduled time and they'll handle everything while you supervise.


Step 5: Schedule pickup. When you've finished loading your dumpster, give us a call and we'll schedule prompt pickup, typically within 24 hours. We haul everything away, dispose of it properly at licensed Rhode Island facilities, and leave your property clean.


Step 6: Enjoy your beautiful new flooring! With old carpet properly disposed of and your renovation complete, you can enjoy your refreshed Rhode Island home without lingering concerns about waste management or cleanup.


Common Questions Rhode Island Homeowners Ask About Carpet Disposal


How much does carpet disposal cost in Rhode Island?


Costs vary by method and project size. DIY transfer station disposal typically costs $200 to $500+ for whole-house projects when factoring in all expenses. Full-service junk removal ranges from $150 for single rooms to $600+ for complete homes. Dumpster rental offers the best value at $475 for 15 yards or $540 for 20 yards, typically saving $100 to $600 compared to alternatives while providing superior convenience.


Can I put carpet in my regular Rhode Island trash pickup?


No. Rhode Island municipalities prohibit carpet in regular curbside trash collection due to its bulk and weight. You must arrange special disposal through transfer stations, junk removal services, or dumpster rental.


Do I need to cut carpet before disposal?


For transfer station disposal, most Rhode Island facilities require carpet cut into 3 to 4-foot-wide strips. For dumpster rental, cutting isn't strictly required but makes loading significantly easier and allows tighter rolling for space efficiency. For full-service junk removal, the company handles all cutting and preparation.


How long does carpet removal take?


Timeline depends on square footage and whether you're working alone or with help. A single bedroom typically requires 2 to 3 hours including removal and loading. A whole house can take 8 to 16 hours spread over multiple days. Full-service professional removal completes most residential projects in 1 to 3 hours regardless of size.


What about carpet padding disposal?


Carpet padding disposes the same way as carpet itself. Roll padding separately and place it in your dumpster alongside carpet rolls. Some Rhode Island transfer stations require padding and carpet to be separated, while dumpster rental allows them together. Full-service junk removal handles padding as part of the overall service.


Can I dispose of other materials along with carpet?


Yes! Dumpster rental allows you to dispose of carpet, padding, tack strips, transition pieces, old baseboards, renovation debris, and most other non-hazardous household materials together. This comprehensive disposal capability makes dumpster rental particularly valuable for larger renovation projects. Avoid prohibited items including hazardous materials, liquids, electronics, and appliances with refrigerants.


What if I underestimate how much dumpster space I need?


If you run out of space in a 15 yard dumpster, you have several options: schedule an early pickup and second delivery, arrange a transfer station trip for remaining materials, or upgrade to a 20 yard dumpster if caught early enough. This is why many Rhode Island homeowners choose the 20 yard option even when unsure—the $65 difference provides valuable insurance against running out of space.


Do you offer same-day dumpster delivery in Rhode Island?


Availability varies by season and current demand, but we do our best to accommodate urgent needs. During slower periods, same-day or next-day delivery is often possible. During peak spring and summer seasons, we recommend booking 1 to 2 weeks in advance to ensure availability for your preferred date.


What areas of Rhode Island do you serve?


Rockhouse Disposal serves Providence, Warwick, Cranston, Pawtucket, East Providence, Woonsocket, Coventry, Cumberland, North Providence, West Warwick, Johnston, North Kingstown, Bristol, Smithfield, Lincoln, Central Falls, Portsmouth, Westerly, East Greenwich, South Kingstown, Narragansett, Barrington, Middletown, Burrillville, Warren, Jamestown, Charlestown, Tiverton, Richmond, Hopkinton, Exeter, North Smithfield, Scituate, Little Compton, New Shoreham, and communities throughout the Ocean State. If you're unsure whether we serve your specific Rhode Island location, just give us a call and we'll confirm coverage.


Don't let carpet disposal delay your Rhode Island home renovation. Contact Rockhouse Disposal today for a free quote on dumpster rental or junk removal services. Our friendly team will answer your questions, recommend the best solution for your specific project, and schedule service at your convenience.


Transform your Rhode Island home with beautiful new flooring while we handle the dirty work of carpet disposal. Your cleaner, fresher space is just one phone call away - reach out to us now and discover why Rhode Island homeowners trust us for affordable, convenient carpet disposal solutions!

By David Antonucci February 8, 2026
Providence stands as one of America's most architecturally significant cities, with over 17,000 historic buildings dotting its neighborhoods. From Federal-style homes on Benefit Street to Victorian mansions in Elmwood, these structures tell the story of Rhode Island's rich past. But renovating a historic home in Providence requires navigating a complex web of regulations, permits, and preservation standards that can overwhelm even experienced homeowners. Whether you're considering purchasing a historic property in College Hill or planning updates to your existing home in the Armory District, understanding Providence's renovation rules is essential. This comprehensive guide walks you through everything you need to know about renovating historic homes in Rhode Island's capital city. Understanding Providence's Historic Districts Providence contains 23 local historic districts, each with specific guidelines protecting the architectural character that makes these neighborhoods unique. The most notable districts include the College Hill Historic District, Broadway-Armory Historic District, and the Elmwood Historic District. Properties within these designated areas face stricter renovation requirements than homes in non-historic zones. The Providence Historic District Commission oversees all exterior changes to buildings within these districts. This means that even seemingly minor modifications like replacing windows, painting your home a different color, or installing new siding require approval. The Commission's goal is preserving the historical integrity of Providence's neighborhoods while allowing homeowners to maintain and improve their properties. Rhode Island also maintains properties on the National Register of Historic Places. While this designation carries prestige and can provide access to tax credits, it comes with federal guidelines administered by the Rhode Island Historical Preservation and Heritage Commission. Understanding which jurisdiction governs your property is the first step in any renovation project. Do You Need Approval? Determining Your Requirements Not every home in Providence requires historic approval for renovations. Properties built after 1945 or located outside designated historic districts typically only need standard building permits from the City of Providence Building Department. However, if your home sits within a local historic district or carries individual landmark status, you'll need to navigate additional approval processes. The key distinction lies between interior and exterior work. Historic commissions primarily concern themselves with exterior changes visible from public streets. This means you generally have more freedom with interior renovations, though structural modifications still require standard building permits regardless of historic status. Common renovations requiring Historic District Commission approval include: Window replacement or modification Roof repairs using different materials Exterior paint color changes Siding installation or repair Door replacements Porch additions or modifications Fence installation Driveway or walkway changes Adding or removing shutters Installing solar panels or HVAC units Interior renovations like updating kitchens, bathrooms, or installing modern systems typically don't require historic approval. However, removing original architectural features such as crown molding, mantels, or historic flooring may face restrictions if they contribute to the building's character. The Certificate of Appropriateness Process Before making exterior changes to a historic property in Providence, you must obtain a Certificate of Appropriateness from the Historic District Commission. This application process involves submitting detailed plans, photographs, and material specifications for review. The Commission evaluates applications based on the Secretary of the Interior's Standards for Rehabilitation, which emphasize preserving historic character while allowing compatible new construction. Your renovation should maintain the property's distinctive features, materials, and craftsmanship from its period of significance. Minor work like routine maintenance using identical materials may qualify for administrative approval, processed more quickly by Commission staff. Major alterations require full Commission review at monthly public hearings. Applications are available through the Providence Department of Planning and Development, and the review process typically takes between four to eight weeks depending on project complexity. When preparing your application, include existing condition photographs, architectural drawings showing proposed changes, material samples, and paint color chips if relevant. The more thorough your documentation, the smoother your approval process. Many homeowners hire architects or contractors experienced with Providence historic renovations to ensure applications meet all requirements. Working with the Secretary of the Interior's Standards The Secretary of the Interior's Standards for Rehabilitation form the foundation of historic preservation guidelines nationwide, and Providence adheres closely to these principles. Understanding these standards helps homeowners plan appropriate renovations that satisfy Commission requirements. The standards emphasize that historic materials should be preserved rather than replaced whenever possible. When replacement becomes necessary, new materials should match the original in composition, design, color, and texture. This means using wood windows if the originals were wood, maintaining brick if your home features brick siding, and preserving slate roofs rather than substituting asphalt shingles. Distinguished features defining your building's historic character must remain intact. These might include decorative cornices, bay windows, transom lights, or distinctive brickwork patterns. Even if these features need repair, the renovation should restore rather than alter their appearance. New additions should be compatible with the existing building in scale, materials, and character, but also distinguishable upon close inspection. This prevents creating a false sense of historical development. A rear addition to an Italianate home, for example, should complement the original architecture without mimicking it so perfectly that it appears historic. Window Replacement in Historic Providence Homes Window replacement generates more controversy in historic preservation than perhaps any other renovation issue. Original windows contribute significantly to a building's character, and Providence's Historic District Commission carefully scrutinizes window replacement applications. Many historic windows in Providence homes feature true divided lights with individual glass panes separated by wooden muntins. These windows often include wavy antique glass, deep sills, and carefully proportioned sashes that reflect their architectural period. The Commission strongly prefers repair and restoration of original windows over replacement. If replacement becomes absolutely necessary due to deterioration beyond repair, new windows must match the original design. This typically means custom-made wooden windows rather than vinyl alternatives, regardless of energy efficiency claims. While vinyl windows have improved, they cannot replicate the appearance, proportions, and detailing of historic wooden windows. Acceptable window solutions in Providence historic districts: Professional restoration of existing wooden windows with weather stripping Storm windows installed on the interior to improve energy efficiency Custom wooden replacement windows matching original profiles Aluminum-clad wood windows in some circumstances Careful repair of sashes, sills, and frames using epoxy consolidants Energy efficiency concerns often drive window replacement requests, but studies show that properly restored wooden windows with storm windows perform comparably to modern replacements while preserving historic character. Several Providence contractors specialize in historic window restoration and can evaluate whether your windows need replacement or just skilled repair. Siding, Roofing, and Exterior Material Guidelines Providence's historic homes showcase diverse exterior materials reflecting different architectural periods and styles. Federal-style homes often feature clapboard siding, Italianate buildings display decorative brickwork, and Victorian houses combine multiple materials in elaborate patterns. Maintaining appropriate materials preserves these distinctions. Removing original siding to install vinyl or aluminum siding faces strong opposition from the Historic District Commission. These synthetic materials cannot replicate the shadow lines, texture, and proportions of historic wood siding or the visual weight of brick and stone. If your home has original clapboard, the Commission expects you to repair and repaint it rather than cover it with modern alternatives. Roof replacements must consider the existing material and architectural style. Many historic Providence homes featured slate roofs, and the Commission encourages maintaining slate when possible. If cost prohibits slate replacement, asphalt shingles that closely match the color and appearance of the original material may receive approval. Metal roofing occasionally gets approved for appropriate building types where it reflects historic practice. Brick repointing requires particular attention. Historic mortar was softer than modern Portland cement mixtures, and using inappropriate mortar can damage historic bricks. Providence preservation guidelines recommend using lime-based mortars that match the original in composition, color, and joint profile. Grinding out historic mortar with power tools can permanently damage bricks, so hand tools are preferred for repointing projects. Additions and New Construction on Historic Properties Adding to a historic home in Providence requires careful planning to ensure the addition complements rather than compromises the original building. The Historic District Commission evaluates additions based on their visibility from public streets, compatibility with the existing structure, and impact on the property's historic character. Rear additions typically receive more favorable consideration than front or side additions because they remain less visible from the street. The Commission expects additions to be clearly identifiable as new construction rather than appearing to be historic fabric. Using similar but distinguishable materials, slightly different window patterns, or subtle variations in details helps achieve this differentiation. Scale matters enormously in addition design. A massive addition that dwarfs the original building destroys the historic property's integrity. Your addition should appear subordinate to the original structure, maintaining similar roof pitches, window proportions, and material relationships while remaining distinct. Demolishing historic outbuildings like carriage houses or garden walls to accommodate additions faces skepticism. These secondary structures contribute to the historic property's character and typically should be preserved. Creative designs can often incorporate existing outbuildings into renovation plans rather than eliminating them. Accessing Rhode Island Historic Tax Credits Rhode Island offers substantial financial incentives for historic rehabilitation through state and federal historic tax credit programs. These credits can offset 20% to 40% of qualified rehabilitation expenses, making ambitious historic renovation projects financially feasible. The federal Historic Preservation Tax Credit provides a 20% credit for income-producing properties listed on the National Register of Historic Places. Commercial buildings, rental properties, and mixed-use structures qualify. The rehabilitation must meet the Secretary of the Interior's Standards, and the Rhode Island Historical Preservation and Heritage Commission reviews projects for compliance. Rhode Island's state historic tax credit program offers an additional 20% credit for projects meeting state requirements. This credit applies to both income-producing and owner-occupied residential properties in historic districts or listed individually on state or national registers. Combined federal and state credits can cover 40% of rehabilitation costs, though various caps and requirements apply. Key requirements for Rhode Island historic tax credits: Property must be listed on the National Register or contribute to a registered historic district Rehabilitation must be substantial, typically exceeding the property's pre-renovation value Work must follow the Secretary of the Interior's Standards Projects require pre-approval and oversight by preservation officials Detailed documentation of existing conditions and completed work is mandatory Many Providence homeowners find these credits make the difference between an affordable renovation and an impossible financial burden. Consulting with architects and accountants experienced in historic tax credit projects early in your planning ensures you structure your renovation to maximize available incentives. Finding Qualified Contractors in Providence Historic renovation requires specialized skills that not all contractors possess. Traditional building techniques, historic material knowledge, and sensitivity to preservation principles distinguish qualified historic contractors from general builders. The Rhode Island Historical Preservation and Heritage Commission maintains a list of contractors experienced in historic rehabilitation. The Preservation Society of Newport County also provides resources for finding qualified professionals. Additionally, Providence's historic neighborhood associations often recommend contractors with proven track records in specific districts. When interviewing contractors, ask about their experience with historic properties, familiarity with Providence's review processes, and approach to matching historic materials and techniques. Request references from previous historic renovation clients and visit completed projects when possible. Contractors who understand historic preservation will discuss appropriate materials, traditional methods, and Commission requirements knowledgeably. Many historic renovations benefit from hiring an architect specializing in historic preservation. These professionals understand local regulations, design compatible additions, prepare Certificate of Appropriateness applications, and ensure contractors follow approved plans. While adding architectural fees to your budget, this expertise often saves money by avoiding costly mistakes and ensuring Commission approval. Common Violations and How to Avoid Them Despite good intentions, many Providence homeowners inadvertently violate historic district regulations. The most common violation involves making exterior changes without obtaining required approvals. Even if you believe your work constitutes minor repair, checking with the Historic District Commission staff prevents potential problems. Installing vinyl siding over original clapboard, replacing wooden windows with vinyl alternatives, or painting previously unpainted brick without approval constitute frequent violations. The Commission can require violators to remove unapproved work and restore the property to its previous condition, regardless of expense. Some homeowners rationalize that changes matching existing conditions don't require approval. This represents a misunderstanding of regulations. Even installing identical replacement materials in some circumstances requires review to ensure appropriate methods and materials. When in doubt, contact Commission staff for guidance. Emergency repairs occasionally necessitate immediate action without prior approval. If deterioration threatens your building's structural integrity or weather protection, document the emergency thoroughly with photographs and contact the Commission as soon as possible. Most preservation officials understand genuine emergencies and work cooperatively with homeowners facing urgent situations. Resources for Providence Historic Homeowners Navigating historic renovation in Providence becomes easier with the right resources. The Providence Department of Planning and Development houses the Historic District Commission and provides application forms, guidelines, and staff assistance. Their website offers downloadable district maps, nomination forms, and design guidelines specific to various Providence neighborhoods. The Providence Preservation Society serves as Rhode Island's leading historic preservation advocacy organization. They offer educational workshops, technical assistance, and advocacy for historic property owners. Their annual Most Endangered Properties List highlights threatened historic buildings and often catalyzes preservation action. The Rhode Island Historical Preservation and Heritage Commission maintains the state's historic property inventory and administers state and federal preservation programs. Their staff provides guidance on National Register listings, historic tax credits, and technical preservation questions. Their publication library includes valuable guides on specific preservation topics from window repair to paint analysis. Local historic neighborhood associations throughout Providence offer community-specific knowledge and support. Organizations like the College Hill Neighborhood Association and Broadway-Armory Historic District Association connect homeowners with neighbors who have successfully navigated renovation projects in their specific districts. Renovating Your Home Renovating a historic home in Providence rewards dedicated homeowners with beautiful, unique properties that honor Rhode Island's architectural heritage. While the approval processes and preservation requirements initially seem daunting, they ensure that Providence retains the distinctive character that makes its neighborhoods special. Start any renovation project by researching your property's historic status and applicable regulations. Contact the Historic District Commission early in your planning to discuss your ideas informally before investing in detailed plans. Work with qualified professionals who understand historic preservation, and consider available financial incentives like tax credits. Your historic Providence home represents more than personal property. These buildings tell our community's story and create the sense of place that distinguishes Providence from anywhere else. By following appropriate renovation guidelines, you preserve this heritage for future generations while creating a comfortable, functional home for your family today.
By David Antonucci February 8, 2026
Rhode Island homeowners and builders face unique challenges when it comes to flood zone construction. With over 400 miles of coastline and numerous rivers threading through Providence, Warwick, Cranston, and other communities, understanding flood zone building requirements isn't just about compliance. It's about protecting your investment and ensuring your family's safety in the Ocean State. The Rhode Island Coastal Resources Management Council (CRMC) works alongside federal FEMA regulations to establish strict building standards for properties in flood-prone areas. Whether you're building in Newport's historic waterfront, developing property along the Pawtuxet River in Warwick, or renovating a coastal home in Narragansett, these requirements will impact your project timeline, budget, and design decisions. Understanding FEMA Flood Zones in Rhode Island Before breaking ground on any construction project in Rhode Island, you need to know your property's flood zone designation. FEMA flood maps divide the state into specific zones that determine your building requirements and flood insurance costs. Zone AE represents high-risk coastal and riverine areas where base flood elevations have been determined. These zones are prevalent along the Providence River, throughout Barrington and Bristol waterfront areas, and across much of South Kingstown's coastal properties. If your property falls in Zone AE, you'll face the strictest building requirements. Zone VE designates high-risk coastal areas subject to wave action. These Velocity Zones exist along Rhode Island's exposed coastlines in communities like Westerly, Charlestown, and Block Island. Building in VE zones requires additional structural considerations beyond standard flood zones due to wave impact forces. Zone X represents moderate to low-risk areas but don't assume you're exempt from flood considerations. Many Providence neighborhoods, parts of Pawtucket along the Blackstone River, and inland sections of East Providence fall into this category. While requirements are less stringent, flood-smart building practices remain important. Zone AO applies to shallow flooding areas, common in some Woonsocket neighborhoods and certain parts of Cumberland where sheet flow flooding occurs. These areas require specific elevation standards even though they're not traditional flood zones. Rhode Island Coastal Resources Management Program Requirements The CRMC Red Book governs all coastal construction activities in Rhode Island. This comprehensive set of regulations applies to any property within the state's coastal zone, which extends well beyond the immediate shoreline into many inland areas of coastal communities. Any structure proposed within 200 feet of coastal features requires CRMC review. This affects thousands of properties across Newport, Middletown, Portsmouth, Tiverton, Little Compton, and Jamestown. The permitting process examines erosion potential, storm surge vulnerability, and environmental impacts before approving construction. CRMC requires new construction and substantial improvements to meet specific elevation standards. In velocity zones, the bottom of the lowest horizontal structural member must be elevated to or above the base flood elevation plus freeboard. Rhode Island typically requires an additional two feet of freeboard beyond the minimum FEMA standard, making actual elevation requirements more stringent than federal minimums. Coastal properties must also address the effects of projected sea level rise. Rhode Island has adopted progressive planning standards that require consideration of future conditions, not just current flood maps. This forward-thinking approach affects design elevations throughout the Washington County coastline and Aquidneck Island communities. Building Elevation Standards Across Rhode Island Communities Providence enforces strict elevation requirements for properties in the Fox Point, India Point, and waterfront areas prone to Narragansett Bay flooding. New construction must elevate living spaces above base flood elevation, with mechanical equipment and utilities placed even higher to prevent damage. Warwick properties along Greenwich Bay and the Pawtuxet River face similar standards. The city's building department requires detailed elevation certificates before issuing permits for construction in Special Flood Hazard Areas. Finished floor elevations must meet or exceed BFE plus local freeboard requirements. Cranston building officials pay particular attention to properties along the Pawtuxet River corridor. Substantial improvement projects trigger the requirement to bring older structures into compliance with current standards, which can significantly impact renovation budgets for homes in Edgewood and Pawtuxet Village. East Providence requires elevation certificates for all properties in identified flood zones before issuing certificates of occupancy. The Watchemoket Cove area and properties along the Seekonk River receive heightened scrutiny during the permitting process. In Newport, the combination of CRMC jurisdiction and local historic district requirements creates a complex regulatory environment. Waterfront properties must balance flood resilience with historic preservation, often requiring creative architectural solutions to meet both sets of standards. Foundation and Structural Requirements for Flood Zones Rhode Island flood zone construction requires specific foundation types depending on your zone designation. Elevated structures in A zones can use various foundation systems including crawlspace foundations, pier and beam systems, or pile foundations. However, any enclosed area below the base flood elevation must include proper flood venting. The key foundation requirements include: Flood vents must be installed in foundation walls to allow automatic entry and exit of floodwaters. Rhode Island requires one square inch of vent opening per square foot of enclosed area. These engineered vents prevent hydrostatic pressure from destroying foundation walls during flooding. Breakaway walls are mandatory in V zones where wave action occurs. These walls must be designed to collapse under specific pressure thresholds without damaging the elevated structure above. Westerly and Narragansett coastal properties regularly incorporate breakaway wall designs. Pile foundations remain the preferred method for V zone construction throughout Rhode Island's barrier beaches and exposed coastal areas. Deep pilings must extend below the erosion depth and be properly engineered to resist lateral wave forces and scour. Materials used below base flood elevation must be flood-resistant. This means marine-grade pressure-treated lumber, concrete, steel, and other materials that can withstand prolonged water exposure without structural deterioration. Standard wood framing cannot be used below the BFE. What Constitutes Substantial Improvement in Rhode Island Understanding substantial improvement rules is critical for Rhode Island property owners planning renovations. When your project costs exceed 50 percent of your structure's pre-improvement market value, you trigger substantial improvement status. This calculation includes all improvements over a rolling ten-year period. Once a project qualifies as substantial improvement, the entire structure must be brought into compliance with current flood zone building requirements. A modest kitchen renovation might not trigger this threshold, but combining that kitchen project with a bathroom remodel and roof replacement within ten years could push you over the limit. Many Pawtucket and Central Falls property owners discover substantial improvement requirements when planning multi-phase renovations on older homes. The cumulative cost approach means you need to track all improvements carefully and plan strategically to avoid unintended compliance triggers. Substantial damage follows similar rules. If flooding or other disasters damage your structure beyond 50 percent of its market value, reconstruction must meet current standards regardless of the building's age or previous grandfather status. This provision has significantly impacted coastal properties after major storm events. Mechanical Systems and Utility Requirements HVAC systems, water heaters, electrical panels, and other mechanical equipment cannot be installed below base flood elevation unless they're specifically designed and certified for underwater operation. Most Rhode Island contractors elevate these systems to upper floors or install them on elevated platforms. Smithfield and North Smithfield properties near rivers often face challenges with basement mechanical systems. When flood maps change or substantial improvements occur, these systems must be relocated above BFE, which can require significant remodeling. Electrical systems must be designed with flooding in mind. Outlets, switches, and wiring below the BFE need special protection. Ground fault circuit interrupters are mandatory for areas subject to flooding, and main electrical panels should be elevated whenever possible. Fuel tanks present special challenges in flood zones. Propane tanks must be properly anchored to prevent flotation during floods. Underground fuel oil tanks are generally discouraged in flood-prone areas throughout Rhode Island due to contamination risks. Building Materials and Flood-Resistant Construction Rhode Island's coastal environment demands careful material selection beyond basic flood resistance. Salt spray in Narragansett Bay communities and barrier beach locations accelerates corrosion and degradation. Approved flood-resistant materials for below-BFE construction include: Pressure-treated lumber rated for ground contact provides rot resistance but still requires proper ventilation and drainage. Many South County builders prefer this material for foundation systems and elevated platforms. Concrete and masonry offer excellent flood resistance when properly reinforced and sealed. Solid concrete or masonry walls can serve as foundations in A zones, though they require proper flood venting. Marine-grade stainless steel fasteners and hardware prevent corrosion in the harsh coastal environment. Standard galvanized hardware fails quickly in salt air, leading to structural problems. Closed-cell spray foam insulation can be used below BFE but must be flood-resistant rated. This material prevents mold growth after flooding events and maintains some insulating value even when wet. Stone and tile flooring materials handle flood exposure better than wood, carpet, or vinyl. Many coastal Rhode Island homes use these materials on ground floors as both a design choice and practical flood mitigation strategy. Permitting Process and Required Documentation Starting a flood zone construction project in Rhode Island requires multiple permits and approvals. The process begins with obtaining an elevation certificate from a licensed land surveyor. This document establishes your property's existing elevation relative to base flood elevation. CRMC assent is required for coastal properties before local building permits can be issued. The application process includes detailed site plans, elevation drawings, and environmental assessments. Processing times vary but typically take 60 to 90 days for standard projects. Local building permits from your municipal building department come next. Cities like Providence, Warwick, and Cranston maintain specialized staff familiar with flood zone requirements. Submit detailed construction plans showing compliance with elevation standards, foundation design, and material specifications. Rhode Island requires a final elevation certificate upon project completion. Your surveyor must certify that construction matches approved plans and meets required elevations. Without this certificate, you cannot obtain a certificate of occupancy or secure flood insurance. Flood Insurance Considerations for Rhode Island Properties The National Flood Insurance Program (NFIP) provides coverage for Rhode Island properties in participating communities. All municipalities along the coast participate in NFIP, making flood insurance available throughout the state. Properties with mortgages in Special Flood Hazard Areas must carry flood insurance. Lenders require this coverage to protect their investment. Even if your mortgage is paid off, flood insurance remains a wise investment given Rhode Island's coastal exposure. Building to exceed minimum requirements can significantly reduce insurance premiums. That additional two feet of freeboard required by Rhode Island not only provides better protection but also qualifies your property for lower insurance rates. Properties elevated three or more feet above BFE see substantial premium reductions. The Community Rating System (CRS) offers additional savings in participating Rhode Island communities. Towns that implement enhanced floodplain management practices earn CRS discounts for residents. Barrington, for example, participates in CRS, providing residents with reduced flood insurance premiums. Common Challenges for Rhode Island Builders and Property Owners Historic properties throughout Newport, Providence, and Bristol face unique challenges. Elevating structures while maintaining historic character requires specialized design approaches and often demands additional review from historic preservation commissions. Lot size constraints in densely developed communities like Wickford village in North Kingstown limit elevation options. Small lots may not provide adequate space for ramps, stairs, and elevated structures while meeting setback requirements. Sewer and water connections become problematic when elevating structures. Properties connected to municipal systems may need pump stations or check valves to prevent sewage backup during floods. Well and septic systems require special consideration to meet both flood zone and Department of Environmental Management standards. Existing nonconforming structures throughout Rhode Island enjoy grandfather protection until substantial improvement or damage occurs. However, this protection creates a false sense of security. When major renovations become necessary, property owners face expensive compliance upgrades they didn't anticipate. Working with Qualified Professionals Rhode Island flood zone construction demands expertise beyond typical residential building knowledge. Licensed engineers should design foundation systems and structural elements for properties in V zones and challenging A zone locations. The Rhode Island Board of Registration for Professional Engineers maintains a roster of qualified professionals. Certified floodplain managers understand the complex interplay between federal, state, and local regulations. These professionals can guide you through permitting processes and help design compliant solutions. The Rhode Island Emergency Management Agency can provide referrals to qualified floodplain managers. Experienced local contractors familiar with Rhode Island's specific requirements provide invaluable assistance. Contractors who regularly work in Westerly, South Kingstown, and other coastal communities understand material selection, construction techniques, and common pitfalls. Always verify that your contractor is licensed and insured in Rhode Island. Licensed surveyors provide the elevation certificates required at multiple project stages. Choose a surveyor experienced with FEMA elevation certificate requirements to avoid delays and ensure accuracy. Long-Term Maintenance and Adaptation Flood zone properties require ongoing maintenance beyond typical home care. Flood vents must remain clear and functional. Landscaping should direct water away from foundations rather than channeling it toward your structure. Rhode Island's changing climate and rising sea levels mean today's compliance may not ensure tomorrow's safety. Property owners should monitor FEMA map updates and consider additional protective measures beyond minimum requirements. Investing in resilience now protects your property value and reduces future risks. Building in Rhode Island's flood zones presents challenges but also opportunities to create truly resilient structures. By understanding and exceeding requirements, working with qualified professionals, and planning for future conditions, you can build or renovate with confidence knowing your property can withstand whatever weather the Ocean State delivers.
By David Antonucci February 8, 2026
Accessory Dwelling Units (ADUs) are transforming how Rhode Island homeowners think about their property. Whether you're in Providence, Warwick, Cranston, Pawtucket, or anywhere else in the Ocean State, understanding ADU regulations can help you add valuable living space while creating affordable housing options in your community. An ADU is a secondary housing unit on a single-family residential lot. These units go by many names: granny flats, in-law apartments, carriage houses, backyard cottages, or garage apartments. Rhode Island has made significant strides in recent years to make ADU construction more accessible to homeowners throughout the state. What Makes Rhode Island's ADU Laws Unique Rhode Island passed groundbreaking legislation in 2022 that fundamentally changed how municipalities can regulate ADUs. The state law requires all cities and towns to allow at least one ADU on single-family residential properties, either attached to the main house or as a detached structure. This means that local zoning ordinances cannot completely prohibit ADUs, though municipalities still maintain some control over specific requirements. The Rhode Island ADU law represents one of the most progressive approaches to accessory dwelling units in New England. It addresses the state's critical affordable housing shortage while giving homeowners more flexibility with their properties. Cities like Providence, Warwick, Cranston, East Providence, and Woonsocket must now accommodate ADU applications under this state framework. Size and Dimensional Requirements for Rhode Island ADUs Understanding size restrictions is crucial when planning your ADU project. Rhode Island law allows municipalities to set reasonable size limits, but these must permit at least one bedroom ADUs of meaningful size. Most Rhode Island cities have adopted requirements that balance allowing functional living spaces while maintaining neighborhood character. In Providence, ADUs can typically be up to 800 square feet or 30 percent of the principal dwelling's gross floor area, whichever is greater. This generous allowance means many homeowners can build substantial ADUs that serve as comfortable, independent living spaces for family members or rental tenants. Warwick ADU regulations similarly permit units up to 800 square feet or 30 percent of the main dwelling size. The city has streamlined its approval process to encourage ADU development as part of its affordable housing strategy. Cranston allows ADUs up to 900 square feet, one of the more generous size limits in the state. This extra space can make a significant difference in creating a truly livable unit that appeals to potential renters or provides comfortable accommodations for aging parents. Common size parameters across Rhode Island cities include: Maximum square footage typically between 600 and 1,000 square feet Height restrictions usually limited to one or one-and-a-half stories Setback requirements from property lines, often 5 to 10 feet Maximum lot coverage percentages to preserve open space Minimum lot size requirements, though many cities have eliminated or reduced these Parking Requirements for ADUs in Rhode Island Parking has historically been a major barrier to ADU construction. Recognizing this, Rhode Island's state law limits how municipalities can impose parking requirements. The legislation prohibits cities and towns from requiring more than one additional parking space for an ADU. Many Rhode Island communities have gone further, eliminating ADU parking requirements entirely in areas with good public transit access. Providence ADU parking rules, for example, waive parking requirements in transit-oriented development zones and near bus routes. This makes ADU construction significantly more feasible in urban neighborhoods where additional parking spaces can be difficult or expensive to create. In Pawtucket, homeowners building ADUs within a half-mile of public transit stations face no additional parking requirements. This encourages ADU development in walkable neighborhoods while supporting the city's sustainability goals. Warwick and Cranston generally require one parking space per ADU, but both cities offer waivers for properties where creating additional parking would be impractical due to lot constraints or where street parking is readily available. Types of ADUs Allowed in Rhode Island Rhode Island homeowners can choose from several ADU configurations depending on their property characteristics and personal needs. The state law requires municipalities to allow both attached and detached ADUs, giving property owners flexibility in their approach. Attached ADUs are built as additions to the existing home or created through interior conversions. Converting a basement, attic, or unused garage into an ADU often represents the most cost-effective option. Basement conversions are particularly popular in Providence and other older Rhode Island cities where many homes already have partially finished lower levels. Detached ADUs are separate structures in the backyard or side yard. These independent units provide more privacy for both the homeowner and ADU occupant. Detached ADUs work well for rental situations or when housing adult children or aging parents who desire independence. Garage conversions combine features of both approaches. Converting an existing detached garage to living space typically costs less than new construction while creating a standalone unit. Many Rhode Island properties have underutilized garages that can be transformed into attractive ADUs. Types of ADU projects commonly permitted include: Basement apartment conversions with separate entrances Above-garage apartments with interior or exterior access Attic conversions with dormers for additional headroom Backyard cottages as new detached structures Attached additions with their own utilities and entrances Owner-Occupancy Requirements in Rhode Island One important consideration for Rhode Island ADUs involves owner-occupancy rules. State law allows municipalities to require that the property owner live in either the primary dwelling or the ADU. This means you cannot create an ADU and then rent out both units unless you maintain your primary residence on the property. Providence requires owner-occupancy for properties with ADUs, meaning at least one unit must serve as the owner's primary residence. This requirement helps ensure ADUs serve their intended purpose of providing housing options while maintaining neighborhood stability. Warwick, Cranston, and most other Rhode Island cities have similar owner-occupancy provisions. However, enforcement varies, and some municipalities offer exemptions for hardship cases or temporary absences. The owner-occupancy requirement differs from some other states that allow fully rental properties with ADUs. Rhode Island's approach balances expanding housing supply with community concerns about absentee landlords and neighborhood character. Permitting and Approval Process for Rhode Island ADUs Building an ADU in Rhode Island requires navigating your local permitting process. While the state has streamlined requirements, you'll still need to work with your city or town's building and zoning departments. The typical Rhode Island ADU approval process includes submitting an application with architectural plans, site plans showing the ADU location, and documentation that your project meets zoning requirements. Your plans must demonstrate compliance with building codes, including electrical, plumbing, and mechanical systems. Most Rhode Island municipalities process ADU applications through administrative review rather than requiring full zoning board hearings. This expedited approach reduces costs and timeline compared to traditional variance processes. Providence typically reviews ADU applications within 30 to 60 days if all required materials are submitted. You'll need to obtain a building permit before starting construction. Your contractor or architect can usually handle this process, but understanding the requirements helps you prepare adequately. Inspections occur at various construction stages, ensuring your ADU meets safety standards. Building Code and Safety Standards All Rhode Island ADUs must comply with the state building code, which is based on the International Residential Code with Rhode Island-specific amendments. This ensures ADUs meet the same safety standards as any other residential construction. Key building code requirements include proper egress windows for bedrooms, smoke detectors and carbon monoxide detectors, adequate ventilation, and appropriate electrical service. Bathrooms must have proper waterproofing and ventilation. Kitchens need sufficient electrical circuits for appliances. Fire safety receives special attention, particularly for attached ADUs and basement conversions. Your ADU must have clear emergency exits and appropriate fire separation from the main dwelling if attached. Working with an experienced contractor familiar with Rhode Island building codes helps ensure compliance. Energy efficiency standards also apply to ADU construction. New ADUs must meet current insulation requirements, window performance standards, and HVAC efficiency minimums. These requirements may add upfront costs but result in lower utility bills and more comfortable living spaces. Utilities and Infrastructure for ADUs Determining how your ADU connects to utilities is an important planning consideration. Rhode Island allows both separate utility connections and shared utilities with the main house, depending on local requirements and property characteristics. Many homeowners choose separate utility meters for their ADUs, especially when renting the unit. Separate meters make billing straightforward and allow tenants to control their own utility usage. Providence and other Rhode Island cities typically permit separate meters for water, electricity, and gas. Alternatively, sharing utilities with the main house can reduce installation costs. This approach works well for family-occupied ADUs where the owner doesn't need separate billing. However, landlords should consider that shared utilities complicate rent pricing and may create disputes over usage. Sewer and water connections usually extend from existing service lines to the ADU. If your property uses a septic system, you'll need to verify it has adequate capacity for an additional dwelling unit. Some properties may require septic system upgrades, adding to project costs. Financing Your Rhode Island ADU Project Understanding financing options helps make your ADU project financially feasible. Rhode Island homeowners typically spend between $100,000 and $300,000 on ADU projects, depending on size, finishes, and whether they're doing new construction or conversion. Home equity loans and home equity lines of credit (HELOCs) are popular ADU financing methods. These leverage your existing home equity at typically favorable interest rates. Many Rhode Island banks and credit unions offer products specifically designed for home improvement projects. Cash-out refinancing allows you to refinance your primary mortgage for more than you owe and use the difference for ADU construction. This can be attractive in low-interest environments or when your home has appreciated significantly. Some homeowners use construction loans that convert to permanent financing once the ADU is complete. FannieMae offers ADU-friendly mortgage products that consider potential rental income when qualifying borrowers. Government programs and incentives may help offset ADU costs: Housing Innovation Challenge grants (when available) Energy efficiency rebates for high-performance construction Property tax considerations in some municipalities Potential rental income tax benefits ADU Rental Income and Financial Benefits Creating rental income represents a primary motivation for many Rhode Island ADU projects. Providence ADU rental rates typically range from $1,200 to $1,800 monthly for well-appointed units in desirable neighborhoods. Warwick and Cranston ADUs command similar rates, while smaller communities may see slightly lower rental prices. Beyond rental income, ADUs increase property values. Real estate data shows homes with legal ADUs sell for premium prices compared to similar properties without additional units. The ability to generate income makes your property more attractive to future buyers. ADUs also provide flexibility as your housing needs change. An ADU can house aging parents, adult children, or provide a private space for caregivers. Later, the same unit can generate retirement income or accommodate your own downsizing needs while maintaining your property. Tax implications of ADU rentals require consideration. Rental income is taxable, but you can deduct expenses including mortgage interest, property taxes, insurance, maintenance, and depreciation. Consulting a tax professional helps maximize these benefits while ensuring compliance. ADU Regulations in Major Rhode Island Cities While state law provides the framework, individual municipalities implement specific ADU requirements. Understanding your local rules is essential for successful project planning. Providence leads Rhode Island in ADU adoption, with comprehensive ordinances encouraging accessory dwelling unit development throughout the city. The capital city allows ADUs in all residential zones and has reduced barriers through parking requirement waivers and streamlined permitting. Warwick adopted ADU regulations that balance state requirements with local concerns. The city allows substantial unit sizes and has worked to educate homeowners about ADU benefits and processes. Cranston permits ADUs citywide with reasonable size and setback requirements. The city has seen growing interest in ADU projects as homeowners recognize their potential. Pawtucket encourages ADUs particularly in areas targeted for revitalization. The city views accessory dwelling units as tools for neighborhood stabilization and affordable housing creation. East Providence, Woonsocket, Newport, and other Rhode Island communities have adopted ADU ordinances complying with state law while reflecting local conditions. Most have embraced ADUs as part of comprehensive housing strategies. Design Considerations for Your Rhode Island ADU Creating an attractive, functional ADU requires thoughtful design. Your unit should complement the main house architecturally while providing comfortable, efficient living space. Consider local architectural styles when designing your ADU. Traditional New England aesthetics dominate Rhode Island, with colonial, Victorian, and Cape Cod styles common. An ADU that harmonizes with these established patterns typically gains easier approval and better neighborhood acceptance. Interior layouts should maximize limited square footage. Open floor plans combining kitchen and living areas create a sense of spaciousness. Built-in storage, Murphy beds, and multifunctional furniture help small units live larger. Natural light significantly impacts how ADUs feel. Generous windows, skylights in attic conversions, and light-colored finishes make spaces feel open and inviting. Pay attention to window placement for both light and privacy. Accessibility features add value and expand your potential tenant pool. Single-floor layouts, wide doorways, and accessible bathrooms allow your ADU to accommodate people with mobility challenges, including aging individuals. Common Challenges and How to Overcome Them Building an ADU isn't without challenges, but understanding common obstacles helps you prepare effective solutions. Lot constraints can limit ADU possibilities. Narrow lots, challenging topography, or wetlands may restrict where you can build. Working with an experienced architect helps identify creative solutions that maximize your property's potential while meeting setback and coverage requirements. Neighbor concerns occasionally arise around ADUs. Addressing privacy issues through thoughtful design, maintaining open communication, and following proper notification procedures helps smooth the approval process. Construction costs can exceed initial estimates. Building detailed budgets with contingency reserves, obtaining multiple contractor quotes, and making strategic choices about finishes helps control expenses. Utility capacity issues sometimes surface, particularly on older properties. Having your systems evaluated early identifies needed upgrades before they delay your project. The Future of ADUs in Rhode Island Rhode Island's commitment to expanding ADU availability continues evolving. Additional legislation may further streamline approvals or provide financial incentives for ADU construction. Several bills under consideration would create ADU financing programs and additional zoning reforms. Growing awareness of ADU benefits drives increased interest among homeowners. As more Rhode Island ADUs are completed and serve as successful examples, others become comfortable with the concept and eager to pursue their own projects. The state housing crisis ensures ADUs remain a policy priority. With rental housing in short supply across Rhode Island, accessory dwelling units provide meaningful contributions to housing availability without large-scale development projects. Climate considerations also support ADU development. Smaller, efficient units typically have lower environmental footprints than traditional housing. Many Rhode Island ADU owners incorporate solar panels, heat pumps, and other sustainable features. Getting Started with Your Rhode Island ADU If you're ready to explore building an ADU, start by researching your specific municipal requirements. Visit your city or town website or contact the planning department to obtain local ADU regulations and application materials. Consider consulting with professionals experienced in Rhode Island ADU projects. Architects familiar with local requirements can help you design compliant, attractive units. Contractors with ADU experience understand unique challenges these projects present. Evaluate your property honestly. Walk your lot considering where an ADU might fit, how you'd provide access, and whether existing structures could be converted. Take measurements and photographs to share with design professionals. Think carefully about your goals. Will you rent the ADU for income, house family members, or create your own future retirement space? Your intended use influences design decisions and helps determine appropriate investment levels.  Building an ADU represents a significant commitment, but for many Rhode Island homeowners, it's one of the best investments they can make. Whether you're in Providence, Warwick, Cranston, or any other Rhode Island community, ADUs offer opportunities to address your housing needs while contributing to solutions for our state's housing challenges.
By David Antonucci February 8, 2026
If you're planning a construction project in Rhode Island, understanding building permit costs is essential for budgeting your renovation, addition, or new construction. Building permit fees vary significantly across Rhode Island's 39 cities and towns, and knowing what to expect can save you from costly surprises. This comprehensive guide breaks down permit costs throughout the Ocean State, from Providence to Westerly, helping you plan your project with confidence. Understanding Rhode Island Building Permit Basics Building permits in Rhode Island are issued at the local level, meaning each municipality sets its own fee structure. Unlike some states with standardized statewide fees, Rhode Island gives individual towns and cities the authority to determine their building department costs. This local control means that a kitchen renovation in Cranston might cost substantially different than the same project in Warwick or Newport. Rhode Island building permits are required for most construction activities, including new home construction, additions, structural alterations, electrical work, plumbing installations, and HVAC systems. Even deck construction, fence installation, and significant renovations typically require permits. The Rhode Island State Building Code provides the framework, but enforcement and fee collection happen at the municipal level. Most Rhode Island towns calculate permit fees using one of several methods. Some charge a flat fee for specific project types, while others use a sliding scale based on construction value. Larger projects generally incur higher fees, and many municipalities charge separate fees for building, electrical, plumbing, and mechanical permits. Providence Building Permit Costs As Rhode Island's capital and largest city, Providence operates one of the busiest building departments in the state. Providence building permit fees are calculated based on the total construction value of your project. For residential projects, Providence typically charges around $15 per $1,000 of construction value for the building permit, with minimum fees usually starting around $100. Electrical permits in Providence run approximately $50 to $150 depending on the scope of work, while plumbing permits follow a similar structure. If you're planning a major renovation in Federal Hill, the East Side, or any Providence neighborhood, expect to pay separate fees for each trade involved. A typical kitchen remodel valued at $30,000 might result in combined permit fees ranging from $500 to $800 when factoring in building, electrical, and plumbing permits. New construction in Providence follows the same percentage-based calculation, meaning a new single-family home valued at $400,000 could have building permit costs exceeding $6,000, plus additional fees for other trades and inspections. Warwick Building Permit Fees Warwick, Rhode Island's second-largest city, uses a fee schedule that combines flat rates for smaller projects with value-based calculations for larger construction. For minor alterations and repairs, Warwick building permits might start as low as $75 to $100. However, additions, substantial renovations, and new construction follow a tiered percentage system. Warwick residents planning home improvements should budget approximately $12 to $18 per $1,000 of construction value. The city also charges separate fees for electrical work, typically ranging from $40 for simple upgrades to several hundred dollars for complete rewiring projects. Plumbing permits in Warwick generally cost between $50 and $200 depending on the number of fixtures and complexity. Popular areas like Apponaug, Oakland Beach, and Conimicut see consistent permit activity, with the Warwick Building Department processing thousands of applications annually. Deck permits, a common request in waterfront neighborhoods, usually cost between $100 and $300 depending on size and elevation. Cranston Building Permits and Costs Cranston building permit costs follow a structure similar to other major Rhode Island cities, with fees calculated as a percentage of total construction value. Cranston charges approximately $14 per $1,000 for residential building permits, with minimum fees typically around $85 to $100. For Cranston homeowners planning additions or renovations in neighborhoods like Edgewood, Garden City, or Western Cranston, you'll need to factor in multiple permit types. A finished basement project might require building, electrical, and potentially plumbing permits, with combined costs ranging from $300 to $700 for a $25,000 project. Cranston also requires permits for certain exterior work, including siding replacement, window installation, and roofing when structural changes are involved. These permits generally cost less than major construction permits, often in the $50 to $150 range, but they're still mandatory for code compliance. Pawtucket and Central Falls Permit Expenses Pawtucket building permits are known for being relatively straightforward, with clear fee schedules available through the city's building department. Pawtucket typically charges between $100 and $200 for minor renovation permits, scaling up based on project value for larger work. The city has worked to streamline its permitting process in recent years, making it easier for residents to understand costs upfront. Central Falls, Rhode Island's smallest and most densely populated city, maintains affordable permit fees to encourage property improvements. Central Falls building permits often start around $75 for minor work, with larger projects calculated at approximately $10 to $15 per $1,000 of construction value. Given the city's urban character and older housing stock, renovation permits are common, and the building department is experienced in handling projects in multi-family and historic properties. East Bay Communities: Barrington, Bristol, and Warren The East Bay towns of Rhode Island each maintain distinct permit fee structures that reflect their community characteristics. Barrington building permits, serving one of Rhode Island's more affluent communities, typically range from $100 for minor alterations to several thousand dollars for substantial new construction or additions. Barrington calculates most permits at approximately $15 to $20 per $1,000 of construction value. The town is known for thorough plan review and inspection processes, which homeowners appreciate for ensuring quality construction. Electrical and plumbing permits add another $75 to $200 each to most projects. Bristol building permit costs are comparable, with the historic waterfront town charging similar percentage-based fees. Bristol's building department handles everything from Colonial-era home renovations to new construction along the harbor, with fees adjusted based on project complexity and value. Warren maintains slightly lower permit fees than its East Bay neighbors, making it attractive for property improvements. Warren building permits often start around $75 to $100, with major projects calculated at roughly $12 to $16 per $1,000 of construction value. South County Building Permit Pricing: Narragansett, South Kingstown, and Westerly South County Rhode Island towns see significant construction activity, particularly in coastal areas where property values run high. Narragansett building permits reflect the town's beach community character, with fees structured to handle everything from seasonal cottage renovations to year-round luxury home construction. Narragansett typically charges $15 to $20 per $1,000 of construction value, with minimum permit fees around $100. Coastal construction often requires additional permits and reviews for environmental compliance, flood zone requirements, and CRMC (Coastal Resources Management Council) approval, which can add to overall costs beyond the basic building permit. South Kingstown building permits cover a large geographic area including URI campus surroundings, Wakefield village, and extensive coastal properties. South Kingstown fees generally range from $100 for minor work to percentage-based calculations for major construction, typically around $14 to $18 per $1,000. Westerly building permit costs are similar to other South County communities, with the town charging tiered fees based on project scope. Westerly's proximity to Connecticut and its popular beaches like Weekapaug and Misquamicut mean the building department regularly processes permits for substantial coastal properties, with fees scaling accordingly. Newport and Aquidneck Island Permit Fees Newport building permits are among Rhode Island's most scrutinized due to the city's historic preservation requirements and high property values. Standard Newport building permits follow a percentage-based fee structure, but many properties in historic districts require additional Historic District Commission approval, which adds time and potential costs to projects. Newport typically charges $15 to $25 per $1,000 of construction value for building permits, with higher rates reflecting the city's thorough review process. Historic district work may require separate application fees ranging from $50 to several hundred dollars depending on project scope. Electrical, plumbing, and mechanical permits each carry additional fees of $75 to $250. Middletown building permits are generally more straightforward than Newport's, with the town charging approximately $12 to $18 per $1,000 for most residential construction. Middletown sees diverse projects from Second Beach cottage renovations to new construction in developing neighborhoods. Portsmouth building permit fees are competitive with other Aquidneck Island communities, typically ranging from $100 minimum to percentage-based calculations for larger work. Portsmouth's mix of rural and suburban character means the building department handles everything from farm structure permits to modern residential developments. Northern Rhode Island: Cumberland, Lincoln, and Smithfield Northern Rhode Island towns offer some of the state's more affordable building permit costs while maintaining rigorous code enforcement. Cumberland building permits typically start around $75 to $100 for minor work, with major construction calculated at approximately $10 to $14 per $1,000 of construction value. Lincoln building permit fees follow a similar structure, making the town attractive for both residential improvements and commercial development. Lincoln charges tiered fees that increase with project value, ensuring larger, more complex projects contribute appropriately to inspection and administrative costs. Smithfield building permits are known for clear fee schedules and efficient processing. Smithfield typically charges between $100 and $200 for standard renovation permits, with new construction and major additions calculated as a percentage of total project cost. Western Rhode Island Building Costs: Coventry, West Greenwich, and Exeter Western Rhode Island's more rural communities often feature lower permit costs than urban and coastal areas. Coventry building permits typically range from $75 for minor alterations to percentage-based fees for substantial construction, usually around $10 to $15 per $1,000. West Greenwich building permit fees are among Rhode Island's most affordable, reflecting the town's rural character and lower cost of living. Permits often start around $50 to $75 for simple projects, making it economical for homeowners to maintain compliance while improving their properties. Exeter maintains similarly reasonable permit costs, with fees structured to encourage proper permitting rather than create financial barriers. Exeter building permits for residential work typically cost between $75 and $150 for standard renovations, scaling up for new construction. Key Factors Affecting Rhode Island Permit Costs Several factors influence your total permit expenses beyond the base building permit fee: Construction value and project scope determine percentage-based fees Multiple trade permits (electrical, plumbing, mechanical) add to total costs Historic district approval may require additional applications and fees Coastal properties often need CRMC permits and environmental reviews Inspection fees may be separate from initial permit costs Plan review fees for complex projects can add hundreds of dollars Expedited processing, where available, typically costs extra Tips for Managing Rhode Island Building Permit Costs Understanding how to navigate Rhode Island's building permit process can help you manage costs effectively. First, always check with your specific town's building department for current fee schedules, as rates can change annually. Many Rhode Island municipalities now offer online permit information and fee calculators. Accurately estimating your construction value is crucial since underestimating can lead to permit complications and potential fines. Use realistic contractor quotes or professional estimates rather than hoping for lower permit fees through undervaluation. Consider bundling work when possible. If you're planning multiple projects, coordinating them might reduce overall permit costs compared to pulling separate permits over time. However, never skip permits to save money as unpermitted work can create serious problems during property sales, insurance claims, or future renovations. Many Rhode Island towns offer senior citizen discounts or reduced fees for certain types of improvements like accessibility modifications or energy efficiency upgrades. Ask your local building department about available programs. Planning your project during slower permit periods can sometimes mean faster processing, and some communities offer pre-application consultations that help you understand requirements before paying fees. Take advantage of these services to avoid costly mistakes or rejected applications.  Rhode Island building permit costs are a necessary investment in your property's safety, value, and legal compliance. While fees vary significantly across the state's 39 municipalities, understanding your local requirements helps you budget accurately and avoid surprises. Whether you're renovating a historic Providence home, building a coastal retreat in Narragansett, or adding space to your Cranston property, proper permitting protects your investment and ensures your project meets Rhode Island's building standards.
By David Antonucci February 8, 2026
When the Atlantic winds start whipping off Narragansett Bay and temperatures plunge below freezing, Rhode Island homeowners know it's time to prepare for winter. From the coastal communities of Newport and Narragansett to the urban neighborhoods of Providence and the suburban streets of Warwick, protecting your home from harsh New England winters isn't just recommended, it's essential. This comprehensive winterization checklist will help you safeguard your property against frozen pipes, ice dams, and costly cold-weather damage. Why Winterizing Your Rhode Island Home Matters Rhode Island's unique coastal climate presents specific challenges for homeowners. Our Ocean State location means we face nor'easters, heavy snowfall, coastal flooding, and rapid temperature fluctuations. Providence averages 36 inches of snow annually, while South County communities like Wakefield and Kingston often see even more. Cranston, Pawtucket, and East Providence residents face similar winter conditions that can wreak havoc on unprepared homes. The investment you make in winterizing your home can save thousands in emergency repairs. A single burst pipe can cause $5,000 to $10,000 in water damage. Ice dams can destroy gutters and create dangerous icicles. Failing to prepare your heating system properly can lead to carbon monoxide risks or complete system failure during the coldest nights. Protecting Your Plumbing and Pipes Frozen pipes rank among the most common and expensive winter home disasters in Rhode Island. Whether you live in historic homes in Bristol or newer construction in Smithfield, taking these steps can prevent catastrophic pipe bursts. Start by insulating exposed pipes in unheated areas like basements, crawl spaces, and garages. Foam pipe insulation is inexpensive and available at any hardware store in Middletown, Johnston, or North Kingstown. Pay special attention to pipes along exterior walls and in attics. Disconnect all outdoor hoses and drain your exterior faucets completely. Water left in outdoor spigots can freeze, expand, and crack the pipes inside your walls. Install frost-proof outdoor faucet covers for additional protection against those bitter January winds that sweep through Woonsocket and Central Falls. If you have sprinkler systems, arrange for professional winterization and blowout service. This is particularly important for homeowners in Barrington, Warren, and other communities with extensive landscaping. Any water remaining in irrigation lines will freeze and cause expensive damage. For homes with interior shut-off valves for outdoor faucets, close these valves and open the outdoor faucets to drain any remaining water. This simple step protects the plumbing in West Warwick, Cumberland, and Lincoln homes from freeze damage. Roof, Gutters, and Ice Dam Prevention Rhode Island's winter precipitation, whether snow or freezing rain, tests every roof from Portsmouth to Burrillville. Proper preparation prevents ice dams, the destructive ridges of ice that form at roof edges and cause water to back up under shingles. Clean your gutters and downspouts thoroughly before the first snowfall. Clogged gutters contribute to ice dam formation and can pull away from your house under the weight of ice. This maintenance is crucial for homes in Tiverton, Little Compton, and other areas prone to heavy snow accumulation. Inspect your roof for damaged, missing, or loose shingles. Even small gaps allow water infiltration when ice dams form. Walk around your property and look for visible damage, or hire a roofing professional in Exeter or Richmond for a thorough inspection. Ensure your attic has adequate insulation and ventilation. Proper attic temperature control prevents the warming that causes snow to melt and refreeze at roof edges, creating ice dams. Many older homes in Woonsocket, Pawtucket, and Central Falls have insufficient attic insulation by modern standards. Install heating cables along roof edges and in gutters if your home is prone to ice dams. These electrical cables prevent ice formation in vulnerable areas. They're common solutions for homes in Jamestown and other coastal communities that face harsh winter conditions. Trim tree branches that hang over your roof. Heavy snow and ice can bring branches down onto your roof, causing serious damage. This is particularly important for the tree-lined streets of Barrington, Bristol, and East Greenwich. Window and Door Weatherproofing Drafty windows and doors waste energy and money. Sealing these gaps keeps your Providence, Cranston, or Warwick home warmer and reduces heating bills by up to 20 percent. Essential weatherproofing tasks include: Installing or replacing weatherstripping around doors and windows Applying caulk to seal gaps and cracks in window frames Using plastic window insulation kits for older single-pane windows Adding door sweeps to exterior doors to block drafts Checking for air leaks around window air conditioners and removing or sealing them for winter Walk through your home on a windy day and feel for drafts around windows and doors. You can also hold a candle near potential leak points and watch for flickering flames that indicate air movement. For residents of historic homes in Newport, Wickford, or downtown Providence, consider interior storm windows. These preserve the appearance of original windows while providing modern insulation benefits. Protecting Your Home's Exterior Rhode Island's winter weather batters home exteriors. Taking protective measures in fall prevents damage that appears when snow melts in spring. Inspect your home's siding, foundation, and masonry for cracks. Water that seeps into cracks freezes, expands, and causes significant damage. Fill any gaps with appropriate caulk or sealant. This is essential maintenance for homes throughout Cumberland, Lincoln, and Smithfield. Store patio furniture, grills, and other outdoor items. Snow and ice damage outdoor furniture, and items left outside become obstacles when plowing or shoveling. Residents of Warwick and Cranston with limited storage can use weather-resistant covers. Drain and store garden hoses. Coil them neatly in your garage or basement. This simple step extends hose life and prevents the frustration of untangling frozen, cracked hoses come spring. Service your snow blower or check your snow removal equipment. Ensure you have ice melt, rock salt, or sand on hand before the first storm. Hardware stores in Johnston, North Providence, and West Warwick sell out quickly when storms approach. Check that your property has adequate outdoor lighting. Winter's early darkness means you'll navigate walkways and driveways in the dark. Motion-sensor lights enhance safety and security during long winter nights. Basement and Foundation Waterproofing Many Rhode Island homes, especially in Providence, Pawtucket, and older communities, have basements susceptible to water infiltration. Winter's freeze-thaw cycles and spring snowmelt create perfect conditions for basement flooding. Test your sump pump before winter. Pour water into the sump pit to ensure the pump activates and drains properly. Consider installing a battery backup system, essential during winter power outages common when nor'easters strike. Clear debris from window wells and ensure they drain properly. Standing water in window wells can freeze and crack basement windows. Inspect foundation walls for cracks or moisture signs. Water that enters through foundation cracks can freeze, causing further damage. This is particularly important for homes in Woonsocket, Central Falls, and other communities with older housing stock. Ensure downspouts direct water at least six feet away from your foundation. Extensions or splash blocks keep water from pooling near basement walls where it can seep through during thaws. Store valuable items off basement floors. Even with preventive measures, basement flooding can occur during severe winter storms or rapid snowmelt. Emergency Preparedness for Winter Storms Rhode Island faces several significant winter storms each season. Nor'easters can bring heavy snow, coastal flooding, and extended power outages to communities from Westerly to Woonsocket. Create a winter emergency kit containing: Flashlights and extra batteries Battery-powered or hand-crank radio First aid supplies Non-perishable food and water for three days Medications and important documents Warm blankets and extra clothing Cell phone chargers and power banks Know how to shut off your home's water main in case pipes burst. Every family member should know this location and procedure. This knowledge proves invaluable during plumbing emergencies in the middle of February snowstorms. Keep your vehicle's gas tank at least half full throughout winter. This ensures you can evacuate if necessary and prevents fuel line freeze-ups during extreme cold. Identify a warm room in your home where your family can gather if heating fails. Close off other rooms to concentrate warmth. Interior rooms without windows work best. Final Winterization Checklist As you prepare your Rhode Island home for winter, work through this final checklist to ensure you haven't missed critical tasks. Whether you're winterizing a cottage in Narragansett, a colonial in Barrington, or an apartment in Providence, these steps protect your investment. Reverse ceiling fan direction to push warm air downward. Most fans have a small switch that reverses blade rotation. Clockwise rotation in winter pushes rising warm air back down. Close foundation vents if your home has them. These should remain open in summer for ventilation but closed in winter to prevent freezing air from entering crawl spaces. Seal your chimney damper when not using your fireplace. An open damper allows expensive heated air to escape up the chimney. Check your home insurance policy. Understand what winter-related damage your policy covers. Consider additional coverage for specific risks like sewer backup or flood insurance, particularly relevant for Warwick, Cranston, and coastal homeowners. Document your home's condition with photos. This creates a record for insurance purposes if winter damage occurs. Protecting Your Investment Winterizing your Rhode Island home requires time and effort, but the protection it provides is invaluable. From the historic streets of Newport to the suburban developments of Coventry, from coastal homes in Little Compton to urban properties in Pawtucket, every Rhode Island home benefits from thorough winter preparation. Start working through this checklist in early fall, tackling outdoor tasks first while weather remains mild. Schedule professional services like heating system inspections and chimney cleaning well in advance. By the time the first nor'easter approaches, your home will be ready to weather whatever our Ocean State winter brings.  Remember that winterization is an investment in your home's longevity and your family's comfort and safety. The money spent on preventive maintenance is far less than the cost of emergency repairs during January's coldest nights. Take pride in protecting your Rhode Island home, and enjoy the winter season knowing you're prepared for whatever Atlantic storms blow our way.
By David Antonucci February 2, 2026
Kitchen renovations represent one of the most significant investments Rhode Island homeowners make in their properties. Whether you're updating a cramped galley kitchen in Providence, modernizing an outdated space in Warwick, or completely transforming your kitchen in Cranston, understanding the renovation process helps ensure your project runs smoothly and delivers the results you're dreaming about. I've seen countless kitchen renovations throughout Rhode Island, and the ones that go smoothest are always those where homeowners understand what to expect at each stage. A well-planned kitchen renovation can increase your home's value by 10-15% and create a space you'll love for decades. On the flip side, a poorly planned renovation becomes a nightmare of cost overruns, delays, and disappointing results. Step One: Define Your Vision and Budget (2-3 Weeks) Before you call a single contractor or visit a showroom, spend time clearly defining what you want from your kitchen renovation. This foundational step prevents costly mistakes and ensures everyone involved in your project is working toward the same goal. Start by identifying what's not working in your current kitchen. Maybe your Pawtucket home has insufficient counter space. Perhaps your East Greenwich kitchen lacks proper lighting. Your Newport kitchen might have an inefficient layout that makes cooking a chore. Write down every frustration and inconvenience you experience in your current space. Next, envision how you want to use your new kitchen. Are you a serious home chef who needs professional-grade appliances and abundant prep space? Do you entertain frequently and need an open layout that connects to your dining and living areas? Will your kitchen serve as a homework center for kids? These functional requirements drive design decisions. Create a realistic budget that accounts for all aspects of the renovation. Rhode Island kitchen renovations typically range from $25,000 for basic updates to $100,000+ for high-end complete remodels. Your budget should include: Cabinets and hardware (typically 30-40% of total budget) Appliances (15-20% of budget) Countertops (10-15% of budget) Labor costs (20-35% of budget) Flooring, lighting, plumbing fixtures, and finishes (remaining percentage) Contingency fund of at least 15-20% for unexpected issues Research design inspiration through magazines, Pinterest, Houzz, and visiting showrooms in Warwick, Cranston, or Providence. Save images of kitchens you love, noting specific elements like cabinet styles, color schemes, or layout configurations. This visual reference proves invaluable when communicating with designers and contractors. Step Two: Hire the Right Professionals (1-2 Weeks) Kitchen renovations require expertise across multiple trades, and hiring the right team makes or breaks your project. You have several options for managing your Rhode Island kitchen renovation. A general contractor manages the entire project, coordinating all subcontractors, obtaining permits, and overseeing work quality. This is typically the best choice for major renovations involving structural changes, moving plumbing or gas lines, or when you prefer a single point of contact. Check contractor licenses through the Rhode Island Contractors' Registration and Licensing Board and verify they carry proper insurance. Kitchen design-build firms offer both design services and construction under one roof. This streamlined approach works well for homeowners who want cohesive design and execution without managing multiple contractors. Many Rhode Island design-build firms have showrooms where you can see cabinet displays and select finishes. For smaller updates or if you're very organized and have construction knowledge, you might hire individual tradespeople directly. This approach potentially saves money but requires you to coordinate schedules, obtain permits, and ensure all work meets code. Interview at least three candidates for whatever professional route you choose. Ask about their experience with Rhode Island kitchen renovations specifically, request references from recent projects in Barrington, Bristol, or other local communities, and verify they understand Rhode Island building codes. Ask to see photos of completed kitchens they've worked on, paying attention to the quality level and style. Get detailed written estimates from each professional. Estimates should break down costs by category and specify exactly what's included. The lowest bid isn't always the best value - consider experience, communication style, and whether you feel comfortable working with this person for the next several months. Step Three: Design and Planning (2-4 Weeks) With your professional team in place, the detailed design phase begins. This is where your vision transforms into specific plans and selections. Work with your designer or contractor to create a functional layout. The kitchen work triangle - the relationship between sink, stove, and refrigerator - remains a fundamental design principle, though modern kitchens often incorporate work zones for different tasks. Consider traffic flow through your kitchen, especially if it connects to other rooms or serves as a thoroughfare in your home. Rhode Island building codes dictate certain requirements for kitchens including electrical outlet spacing, ventilation requirements, and clearances around appliances. Your designer should factor these into the layout from the beginning to avoid costly changes later. Select your cabinetry carefully, as this represents the largest portion of your budget and dramatically impacts your kitchen's appearance and functionality. Cabinet choices include: Stock cabinets: Most affordable, limited sizes and styles, available quickly Semi-custom cabinets: Mid-range pricing, more size and finish options, moderate lead times Custom cabinets: Highest cost, unlimited options, longest lead times (often 8-12 weeks) Choose countertop materials based on durability, maintenance requirements, and aesthetics. Granite remains popular in Rhode Island kitchens for its durability and classic look. Quartz offers a similar appearance with less maintenance. Butcher block, concrete, and marble each have distinct advantages and drawbacks to consider. Appliance selection affects both function and budget significantly. Decide early whether you're keeping existing appliances, upgrading to mid-range models, or investing in professional-grade equipment. Keep in mind that professional appliances often require upgraded electrical service or gas lines, adding to your renovation costs. During this phase, your contractor or designer will create detailed drawings and specifications. These documents serve as the blueprint for your renovation and the basis for obtaining permits. Step Four: Obtain Permits and Order Materials (1-3 Weeks) Rhode Island municipalities require permits for kitchen renovations that involve electrical, plumbing, or structural work. Your contractor typically handles permit applications, submitting your plans to the local building department for review and approval. Permit approval times vary by municipality. Providence and Warwick have established building departments with relatively quick turnaround, often approving straightforward kitchen renovations within a week. Smaller towns might have part-time building officials who review plans less frequently, potentially extending this timeline. Once permits are approved, order all long-lead-time items immediately. Custom cabinets can take 8-12 weeks from order to delivery. Specialty appliances might have similar wait times. Countertops require templating after cabinets are installed, then another 1-2 weeks for fabrication and installation. Create a detailed project schedule with your contractor that accounts for material delivery dates. Nothing stalls a project faster than reaching a phase where the necessary materials haven't arrived. Step Five: Demolition and Removal (2-5 Days) Demo day marks the point of no return for your kitchen renovation. Your functional kitchen becomes a construction zone, and you'll be without a kitchen for the duration of the project. Before demolition starts, set up a temporary kitchen elsewhere in your home. Many Rhode Island homeowners use their basement, dining room, or garage for a makeshift kitchen with a microwave, toaster oven, coffee maker, and mini-fridge. Stock up on paper plates and plan for more takeout than usual. Professional demolition crews remove existing cabinets, countertops, appliances, and flooring. They'll protect adjacent rooms with plastic barriers to contain dust, though expect fine dust to migrate throughout your home despite precautions. If your renovation includes removing walls or relocating plumbing, demolition takes longer and creates more mess. Contractors haul away demolition debris, leaving you with bare walls, subfloor, and rough plumbing and electrical. This is when hidden problems often surface. Old Rhode Island homes frequently reveal outdated wiring, water damage, or structural issues hidden behind cabinets. Budget your contingency fund for these discoveries. Step Six: Rough-In Work (1-2 Weeks) The rough-in phase involves all the behind-the-walls work that makes your kitchen functional. Multiple licensed tradespeople typically work during this phase. Plumbers relocate water supply lines and drain pipes to match your new layout. If you're adding a kitchen island with a sink, this requires running plumbing through the floor. Moving your sink location or adding a pot filler at the stove involves significant plumbing work. Electricians install new circuits for appliances, add outlets to meet current code requirements, and run wiring for your lighting plan. Modern kitchens require dedicated circuits for refrigerators, dishwashers, microwaves, and disposals. If you're upgrading to a professional range, you might need new 240-volt circuits. Under-cabinet lighting, pendant lights over islands, and recessed ceiling lights all require new wiring. HVAC contractors adjust ductwork if your renovation changes the kitchen footprint or ceiling height. Proper ventilation is critical - Rhode Island code requires range hoods to vent outside for gas ranges and recommends it for electric ranges. If you're removing walls or adding a kitchen island, structural work happens during rough-in. Support beams might be necessary when removing load-bearing walls. Your contractor should have had an engineer review structural plans before starting this work. Building inspectors visit after rough-in completion to verify all electrical, plumbing, and structural work meets code. Work cannot proceed until these inspections pass. Schedule inspections promptly to avoid delays. Step Seven: Installation of Cabinets and Countertops (1-2 Weeks) With rough-in inspections complete, installation of finish materials begins. This is when your new kitchen starts taking recognizable shape. Cabinet installation comes first. Professional installers ensure cabinets are level, securely anchored to walls, and properly aligned. Base cabinets go in before wall cabinets. The installation sequence matters because errors early in the process compound as work progresses. Once cabinets are installed and settled, countertop fabricators visit to create templates. They take precise measurements and create templates from thin plywood or cardboard that account for every angle, outlet cutout, and edge detail. Templating typically takes a few hours. Fabrication of stone countertops takes 7-10 days from template to installation. The fabricator cuts your slabs, creates edge profiles, cuts holes for sinks and faucets, and polishes everything to perfection. Installation usually happens in a single day, with installers securing countertops to cabinets, seaming multiple pieces together, and caulking along walls. Step Eight: Flooring, Backsplash, and Final Finishes (1-2 Weeks) The final phase involves all the elements that complete your kitchen transformation. Flooring installation timing depends on your material choice. Many contractors prefer installing hardwood or tile before cabinets to ensure continuous flooring throughout the space. If you're doing this, flooring happens much earlier in the process. Luxury vinyl plank or engineered wood often gets installed after cabinets to avoid damage during construction. Backsplash installation adds personality and protects walls from cooking splashes. Tile backsplashes require careful layout, cutting, grouting, and sealing. The process typically takes 2-3 days including drying time. Appliances get installed and connected to plumbing, electrical, and gas lines. Professional installation is essential for gas appliances to ensure safe connections. Built-in appliances must be installed precisely to achieve the seamless look that makes them attractive. Light fixtures, cabinet hardware, and plumbing fixtures get installed. These finishing touches complete the look and make your kitchen functional. Final electrical and plumbing inspections verify all finished work meets code requirements. Your contractor will complete a final walkthrough, addressing any punch list items that need correction or adjustment. Once you approve the finished work, your kitchen renovation is complete. Living Through Your Kitchen Renovation The renovation process disrupts normal life, especially in Rhode Island's smaller homes where the kitchen often serves as the heart of daily activity. Expect the process to take 6-12 weeks for most complete renovations, longer for extensive projects or those delayed by material availability. Communicate regularly with your contractor about progress and any concerns. Document everything with photos. If issues arise, address them immediately rather than waiting. Your renovated kitchen will serve your family for decades, providing a beautiful, functional space for cooking, gathering, and making memories. Whether you're in Smithfield, Cumberland, Lincoln, or anywhere else in Rhode Island, a well-executed kitchen renovation represents one of the best investments you can make in your home's value and your family's quality of life.
By David Antonucci February 2, 2026
If you're considering finishing your basement in Rhode Island, one of the first questions on your mind is probably "how long is this going to take?" It's a fair question, especially when you're planning to add valuable living space to your home in Providence, Warwick, Cranston, or anywhere else in the Ocean State. Understanding the basement finishing timeline helps you plan around the disruption, budget accordingly, and set realistic expectations for when you'll be enjoying your new space. The truth is that basement finishing timelines vary significantly based on several factors, from the size and complexity of your project to the current condition of your basement and the availability of contractors. A basic 500-square-foot basement conversion in Pawtucket might take just a few weeks, while a complex 1,500-square-foot basement in East Greenwich with a full bathroom, kitchen, and custom features could stretch to several months. Initial Planning and Design Phase (2-4 Weeks) Before a single nail gets hammered, you'll spend time planning your basement finishing project. This phase is crucial and shouldn't be rushed, even though it's tempting to jump right into construction. During the initial consultation, you'll meet with contractors to discuss your vision, needs, and budget. Rhode Island contractors worth their salt will want to see your basement, assess its current condition, and identify any potential issues like moisture problems, foundation cracks, or outdated electrical systems. This is especially important in older homes throughout Newport, Bristol, and other historic Rhode Island communities where basements might have quirks that need addressing. The design phase involves creating detailed plans for your new space. You'll decide on the layout, choose finishes, select fixtures, and make countless decisions about everything from flooring to lighting. If you're adding a bathroom or kitchen, you'll need to plan plumbing locations carefully. If you're creating a home theater in Barrington or a mother-in-law suite in Smithfield, those design considerations take time to work out properly. This is also when you'll apply for permits. Rhode Island municipalities require permits for basement finishing work, and the approval process can take anywhere from a few days to several weeks depending on your local building department's workload and the complexity of your project. Cities like Providence and Warwick typically have more streamlined processes, while smaller towns might have building inspectors who only work certain days of the week. Preliminary Work and Preparations (1-2 Weeks) Once permits are approved and you've signed a contract, contractors can begin preliminary work. This phase involves getting your basement ready for the actual finishing work. If you have moisture issues - and many Rhode Island basements do, given our high water table and coastal climate - these need to be addressed first. Waterproofing work might include installing interior drainage systems, applying sealants, or even excavating exterior walls to install proper drainage. This can add anywhere from a few days to two weeks to your timeline, but it's absolutely essential. No point in finishing a basement in Cumberland or Lincoln only to have it flood during the next heavy rainstorm. Contractors will also address any structural concerns during this phase. Cracked foundations, settling floors, or inadequate support beams all need fixing before finishing work begins. These repairs are more common in older Rhode Island homes but can pop up anywhere. The space needs to be cleared and prepped. If you're using your basement for storage like most Rhode Island homeowners, everything needs to be moved out. Contractors might also need to remove old paneling, drop ceilings, or other outdated finishes from previous attempts at finishing the space. Rough-In Phase: Framing, Electrical, and Plumbing (2-4 Weeks) The rough-in phase is where your basement really starts to take shape. This is typically the longest phase of the project and involves multiple trades working in sequence. Framing comes first. Carpenters will build walls to create your new floor plan, frame out any soffits needed to conceal ductwork or pipes, and build any structural elements like stairs or support walls. In a straightforward basement with simple layouts, framing might take just a few days. More complex designs with multiple rooms, angled walls, or custom features can take a week or more. Here's what happens during the rough-in phase: Electricians run wiring for outlets, switches, and lighting fixtures throughout the space HVAC technicians install ductwork and registers to heat and cool your new living area Plumbers rough in any bathroom or kitchen fixtures, running water supply lines and drain pipes Low-voltage wiring gets installed for internet, cable, phone, and any smart home features you're adding Each of these trades needs access to the framing, and they often need to work in a specific sequence. Electricians and plumbers sometimes need to coordinate around each other, especially in tight spaces. In Rhode Island, these contractors are typically licensed and need to pull their own permits, which means scheduling can get complicated if your general contractor doesn't have reliable subs lined up. This phase also includes installing insulation in the framed walls. Rhode Island building codes have specific R-value requirements for basement insulation, and your contractor should be using insulation appropriate for below-grade applications that won't trap moisture. Once all the rough-in work is complete, you'll have inspections. Building inspectors from your municipality will come to verify that electrical, plumbing, and structural work meets code requirements. You cannot proceed to the next phase until these inspections pass. In busy seasons, getting an inspector out to your Warwick or Cranston home might take several days, so this can add time to your timeline. Drywall, Flooring, and Interior Finishes (2-3 Weeks) After rough-in inspections pass, the finishing phase begins. This is when your basement starts looking like actual living space instead of a construction zone. Drywall installation typically takes a few days for an average basement. Hangers will install sheets on all your framed walls and ceilings, then tapers will apply joint compound, sand it smooth, and prepare surfaces for paint. The taping and sanding process requires multiple coats with drying time between each application, so you can't rush this even if you wanted to. While drywall is drying, other trades can work on installing elements that don't interfere with wall finishing. This might include setting tile in bathroom areas, installing the subfloor system, or beginning trim work in areas that are ready. Flooring installation comes after drywall is complete to avoid damage. The type of flooring you choose affects the timeline. Luxury vinyl plank or tile can go down relatively quickly - often in just a day or two for a typical basement. Carpet requires stretching and careful fitting around obstacles. If you're installing hardwood or engineered wood in your Narragansett or South Kingstown basement (less common below grade, but sometimes done), that process takes longer and requires specific moisture considerations. Painting follows flooring in most cases, though some contractors prefer to paint before flooring goes down. A professional paint crew can typically paint an entire basement in 2-3 days including prime coat and two finish coats. Trim work, including baseboards, door casings, and any crown molding, gets installed toward the end. A skilled trim carpenter can complete this in a few days for most basements, longer if you've chosen intricate moldings or have lots of doors and windows. Final Installations and Finishing Touches (1-2 Weeks) The home stretch involves installing all the finish fixtures and completing final details that make your basement functional and beautiful. Electricians return to install light fixtures, outlets, switches, and any specialty electrical items like ceiling fans or smart home controls. Plumbers install toilets, sinks, faucets, and any other finish plumbing fixtures. HVAC technicians install vent covers and make final system adjustments. If you're adding a kitchenette or wet bar, cabinet installation happens during this phase. Countertops get templated and installed, which typically requires at least a week's lead time from measurement to installation for granite or quartz. Interior doors get hung and hardware installed. Any built-in shelving, entertainment centers, or custom millwork gets completed. Final touch-up painting addresses any dings or marks that occurred during finish installations. The contractor will also complete any punch list items - minor fixes, adjustments, or touch-ups that need addressing before calling the job complete. Final inspections happen at the end. Building inspectors return to verify that all finish work meets code and that everything has been completed properly. Once you receive your certificate of occupancy or final inspection approval, your basement is officially done and ready to use. Factors That Extend Your Timeline Several factors can stretch your basement finishing timeline beyond these estimates. Understanding them helps you plan accordingly. Weather impacts basement projects more than you might think. Heavy rain or snow can delay deliveries, make it difficult for contractors to access your home, or even cause water infiltration that needs addressing before work continues. Rhode Island winters can be particularly disruptive, with snow and ice making job sites harder to access. Material availability affects timelines significantly. Special order cabinets might take 6-8 weeks to arrive. Custom windows or doors add lead time. Even standard materials can be backordered during busy construction seasons. Discovery of unexpected issues is common in basement finishing. You might find outdated wiring that needs replacing, discover foundation problems hidden behind old paneling, or encounter plumbing that doesn't meet current code. Each of these discoveries adds time to your project. Permit delays can stretch timelines, especially if your plans need revisions or if building departments are understaffed. Some Rhode Island towns have part-time building inspectors who only work certain days, which can slow the inspection process. Your own decision-making impacts the schedule too. Contractors can't order materials or proceed with work until you make selections. Changing your mind mid-project about finishes, layouts, or features can add significant time and cost. Typical Timeline for Common Basement Projects To give you a realistic expectation, here are typical timelines for common basement finishing scenarios in Rhode Island: Basic open-concept basement with simple layout: 4-6 weeks Mid-range basement with one bathroom and multiple defined spaces: 8-12 weeks High-end basement with full bathroom, kitchenette, and custom features: 12-16 weeks Complex basement with multiple bathrooms, elaborate finishes, and significant structural work: 16-20+ weeks These timelines assume normal working conditions, available materials, and no major unexpected issues. Always add a buffer to your expected timeline - things rarely go exactly as planned in construction. Working With Rhode Island Contractors Choosing the right contractor dramatically impacts your basement finishing timeline. Experienced Rhode Island contractors who specialize in basement work understand local building codes, have reliable relationships with inspectors, and maintain good sub-contractor networks that prevent scheduling delays. Get multiple quotes but don't automatically choose the lowest bid. A contractor who promises an unrealistically short timeline is either inexperienced or planning to cut corners. Ask for references from recent basement finishing projects in Providence, Warwick, Cranston, or other Rhode Island communities. Check their license status with the Rhode Island Contractors' Registration and Licensing Board. Discuss the timeline explicitly before signing a contract. Make sure you understand what might cause delays and how those will be handled. Get a detailed project schedule that breaks down each phase. Your finished basement will add significant value and living space to your Rhode Island home, whether you're in Johnston, North Providence, West Warwick, or anywhere else in the state. Understanding the timeline helps you prepare for the process and ensures you have realistic expectations about when you'll be hosting movie nights, accommodating guests, or enjoying your new home gym in your beautifully finished basement space.
By David Antonucci February 2, 2026
If you've noticed your deck starting to slope, bounce excessively when you walk across it, or show visible dips in certain areas, you're likely dealing with sagging deck joists. This is one of the most common structural issues Rhode Island homeowners face with their outdoor decks, and it's something that shouldn't be ignored. A sagging deck isn't just an eyesore - it's a safety hazard that can lead to complete deck failure if left unaddressed. Living in Rhode Island, our decks take a beating from harsh winters, humid summers, and everything in between. The freeze-thaw cycles we experience from Providence to Newport can wreak havoc on deck structures, particularly the joists that form the foundation of your deck's surface. Whether you're in Warwick, Cranston, Pawtucket, or anywhere else in the Ocean State, understanding how to identify and fix sagging joists is essential for maintaining a safe outdoor living space. What Causes Deck Joists to Sag? Before diving into fixes, it's helpful to understand why deck joists sag in the first place. The joists are the horizontal support beams that run perpendicular to your deck boards, and they're responsible for supporting the entire weight of your deck, including furniture, people, and that grill you use for summer cookouts. Several factors contribute to joist sagging in Rhode Island homes. Wood rot is perhaps the most common culprit, especially in our humid coastal climate. When joists are exposed to moisture without proper ventilation or drainage, the wood begins to deteriorate from the inside out. This is particularly problematic in areas like East Greenwich, Bristol, and other waterfront communities where salt air accelerates the deterioration process. Improper spacing is another major issue. Building codes require joists to be spaced at specific intervals based on the joist size and the type of decking material used. When joists are spaced too far apart, they can't adequately support the load, leading to sagging over time. This is something I've seen frequently in older decks throughout Cumberland and Lincoln that were built before current building codes were strictly enforced. Undersized joists for the deck span also create problems. A 2x6 joist might work fine for a small deck, but use it on a 16-foot span and you're asking for trouble. Rhode Island's building codes have specific requirements for joist sizing, and violating these standards leads to structural failure down the line. Finally, inadequate support posts or footings can cause the entire deck structure to settle unevenly. When the posts aren't deep enough to get below the frost line - which is 48 inches in Rhode Island - frost heaving during our cold winters can shift the foundation and cause joists to sag. Inspecting Your Deck Joists for Damage Before you can fix sagging joists, you need to thoroughly inspect your deck to understand the extent of the problem. Start by getting underneath your deck with a flashlight and really examining each joist carefully. Look for signs of rot, which often appears as darkened, soft, or crumbling wood. Use a screwdriver to probe suspicious areas - if the screwdriver sinks in easily, you've got rot. Check for cracks, splits, or warping in the joists. These structural defects compromise the joist's ability to bear weight and will only worsen over time. Pay special attention to where joists connect to the ledger board (the board attached to your house) and where they rest on beams or posts. These connection points are critical and prone to moisture damage. While you're down there, look for insect damage. Carpenter ants and termites are active throughout Rhode Island, and they love damp wood. If you see small holes, sawdust, or hollowed-out sections, you may be dealing with an infestation on top of structural issues. Measure the deflection of sagging joists. Building codes generally allow for a maximum deflection of span/360, which means a 12-foot joist shouldn't sag more than about 0.4 inches under normal load. If you're seeing significantly more sag than this, you've got a problem that needs immediate attention. Fixing Minor Joist Sagging: Sistering Joists For joists that show minor sagging but are otherwise structurally sound, sistering is often the best solution. This involves attaching a new joist alongside the existing damaged or sagging joist, effectively doubling its strength and correcting the sag. To sister a joist, you'll first need to support the deck temporarily using adjustable jack posts positioned beneath the sagging area. Gradually jack up the deck until the joist returns to its proper level - don't rush this process, as forcing it too quickly can cause additional damage. Once level, cut a new joist to match the length of the existing one, using pressure-treated lumber rated for ground contact. Apply construction adhesive to the face of the new joist, then position it tightly against the existing joist. Secure the two together using 3-inch structural screws or 16d galvanized nails, spacing them every 12-16 inches in a staggered pattern. Make sure your fasteners penetrate both joists fully. The sistered joist should make full contact with any beams or ledger boards, just like the original. This method works great for isolated problem joists and is something many Westerly and South Kingstown homeowners can tackle as a DIY project if they're comfortable with the work. Just make sure you're following local building codes and pulling permits if required. Replacing Severely Damaged Joists When a joist is severely rotted, cracked, or otherwise compromised, sistering won't cut it - you need complete replacement. This is more involved but necessary when the structural integrity is seriously compromised. Start by removing the deck boards above the damaged joist. You may need to remove several rows to access the joist properly and provide working room. Support the deck with temporary bracing on either side of the joist you're replacing. Using a reciprocating saw, cut out the damaged joist, being careful not to damage adjacent joists or the rim joist. Install your new pressure-treated joist, making sure it sits flush with the adjacent joists and is properly secured to the ledger board and beam with appropriate joist hangers. Joist hangers are critical - don't skip them thinking you can just toe-nail the joist in place. Rhode Island building inspectors will definitely call this out, and more importantly, it's just not safe. Once the new joist is secured, you can reinstall the deck boards. This is a good time to inspect the boards themselves and replace any that show signs of rot or damage. Addressing Underlying Support Issues Sometimes the joists aren't the problem - the support structure beneath them is. If your deck posts have settled or your beams are sagging, you'll need to address these issues to prevent future joist problems. For settled posts, you may need to excavate around the footing and either raise the existing post or install a new, properly sized footing below the frost line. In Rhode Island, that means going at least 48 inches deep. This is particularly important in areas with poor soil conditions, which you'll find in parts of Johnston, North Providence, and other communities built on fill. Sagging beams might need to be sistered similar to joists, or in severe cases, completely replaced. The beam is what supports all your joists, so if it's compromised, everything above it will eventually fail. Preventing Future Joist Sagging Once you've fixed your sagging joists, take steps to prevent the problem from recurring. Proper drainage is essential - make sure water can flow away from your deck structure. Clean out any debris that accumulates between joists, as this traps moisture and accelerates rot. Consider installing flashing tape on top of joists before laying deck boards. This creates a moisture barrier that significantly extends joist life. It's a small investment that pays major dividends in areas like Narragansett and Charlestown where salt air is constantly present. Apply a quality water-repellent sealer to all exposed wood surfaces every 2-3 years. Rhode Island's weather is tough on outdoor structures, and regular maintenance is the best way to extend your deck's lifespan. Ensure adequate ventilation beneath your deck. Trim back vegetation and remove any skirting that prevents air circulation. Stagnant air beneath a deck creates the perfect environment for moisture and rot. When to Call a Professional While some joist repairs are suitable for experienced DIYers, many situations call for professional help. If you're dealing with extensive rot affecting multiple joists, significant structural settling, or if you're simply not confident in your ability to safely complete the repairs, it's time to call in a licensed contractor. A professional deck builder in Rhode Island will be familiar with local building codes, can pull the necessary permits, and has the experience to identify problems you might miss. They can also ensure the repairs are done correctly and safely, which is crucial when you're dealing with a structure that people will be standing on. The cost of professional deck joist repair varies depending on the extent of damage, but expect to pay anywhere from a few hundred dollars for minor sistering work up to several thousand for extensive structural repairs or complete joist replacement on larger decks. Your deck is a valuable extension of your Rhode Island home, whether you're overlooking Narragansett Bay in Barrington or enjoying your backyard in Smithfield. Addressing sagging joists promptly protects your investment and ensures your outdoor space remains safe for family and friends. Regular inspections, proper maintenance, and addressing problems early will keep your deck solid and level for decades to come.
By David Antonucci February 2, 2026
Opening up your Rhode Island home by removing a wall can completely transform your living space. But before you start swinging a sledgehammer, you need to know whether that wall is load-bearing - and if it is, the proper way to remove it safely. Load-bearing wall removal is one of the most complex home renovation projects you can undertake, requiring structural engineering, proper permits, and experienced contractors familiar with Rhode Island's diverse housing stock. Whether you're modernizing a Victorian in Providence, opening up a Cape Cod in Warwick, renovating a colonial in Cranston, or updating a ranch in Pawtucket, removing load-bearing walls creates the open floor plans today's homeowners want. However, the process involves careful planning, professional engineering, strict permitting requirements, and construction expertise that goes far beyond typical remodeling work. What Makes a Wall Load-Bearing? Load-bearing walls support the weight of structural elements above them - roof systems, upper floors, ceilings, and everything they carry. Remove a load-bearing wall without proper replacement support, and you risk serious structural failure including sagging ceilings, cracked walls, stuck doors and windows, sloping floors, and in severe cases, partial collapse of your home. Non-load-bearing walls, also called partition walls, simply divide interior space without supporting any weight from above. These walls can usually be removed with minimal structural concerns, though you still need building permits and should always verify their status before demolition begins. The distinction matters enormously. A non-bearing partition wall might cost $500-1,500 to remove, while eliminating a load-bearing wall typically runs $3,000-10,000 or more depending on span and structural requirements. How Rhode Island Homes Carry Structural Loads Understanding how your specific home distributes weight helps you identify which walls are likely load-bearing. Rhode Island's diverse housing stock includes everything from 18th-century colonials to post-war ranches, each with different structural systems. Traditional New England timber frame homes common throughout Providence, Newport, Bristol, and historic Rhode Island neighborhoods typically feature central bearing walls running the length of the house. Floor joists span from exterior walls to this central support wall, then continue to the opposite exterior wall. This creates a structural system where the central wall and both exterior walls bear loads. Cape Cod style homes popular across Rhode Island often have a similar central bearing wall configuration, with the added complexity of second-floor knee walls that may or may not bear loads depending on how the roof framing connects. Ranch homes built throughout Warwick, Cranston, Coventry, and suburban Rhode Island during the 1950s-1970s frequently use simpler structural systems. Many ranches have load-bearing walls only at the exterior perimeter, with engineered roof trusses spanning the entire width without needing intermediate support. This makes interior remodeling easier in ranches compared to older homes. Multi-family homes common in Providence, Pawtucket, Central Falls, and Woonsocket typically have bearing walls between units providing both structural support and fire separation. These walls usually can't be removed without extensive engineering and may violate fire codes if eliminated entirely. Colonial style homes feature box-frame construction with exterior bearing walls and often one or two interior bearing walls depending on the home's width. The specific configuration varies based on floor joist span capabilities and roof framing design. How to Identify Load-Bearing Walls Determining whether a wall bears structural loads requires investigation and professional expertise. While certain clues suggest load-bearing status, only structural engineers or highly experienced contractors can definitively identify bearing walls and design proper support systems. Wall Direction and Joist Orientation One of the most reliable indicators involves wall direction relative to floor joists. Walls running perpendicular (at right angles) to the floor joists they support are often load-bearing. In most Rhode Island homes, floor joists run front-to-back or side-to-side depending on the home's design. Walls running the opposite direction frequently support those joists. You can usually determine joist direction from your basement or attic where framing is visible. In finished spaces, sometimes you can identify joist direction by looking at how floorboards run - though this isn't always reliable since flooring can run any direction regardless of framing. Walls running parallel to floor joists are less likely to be load-bearing, though exceptions exist. Some parallel walls sit directly over basement support beams and carry loads from upper floors or roof structures. Location Within Your Home Certain locations strongly suggest load-bearing walls. Exterior walls nearly always bear loads, supporting roof structures and upper floor systems. Assume all exterior walls are load-bearing unless structural analysis proves otherwise. Central walls running down the middle of your home, especially in older Rhode Island houses, frequently support floor joists spanning from the central beam to exterior walls. These walls often align with main support beams in your basement - a strong indicator of bearing wall status. Walls directly above basement support beams, steel columns, or foundation walls typically continue that structural load path upward through your house. Go to your basement and look up - walls above major support elements probably bear loads. Walls that continue from basement through first floor to second floor or attic suggest structural continuity and likely bearing status. Non-bearing partition walls often start and stop at different floor levels. Construction Details That Indicate Bearing Walls The way walls are built provides clues about their structural role. Load-bearing walls typically use larger framing lumber - 2x6 studs instead of 2x4s - though this isn't universal. Older Rhode Island homes sometimes use full 2x4 lumber (actually 2 inches by 4 inches, unlike modern dimensional 2x4s that measure 1.5 x 3.5 inches) even for bearing walls. Load-bearing walls feature doubled or tripled top plates - the horizontal framing members running along the wall's top. These doubled plates help distribute loads across multiple wall studs. Non-bearing partitions often have single top plates, though again, some builders over-build partitions making this indicator unreliable. Look at headers above doorways and openings. Load-bearing walls need substantial headers to carry loads around openings. Large built-up headers made from doubled 2x10s or 2x12s, or engineered lumber, suggest bearing walls. Single boards spanning above doors often indicate non-bearing partitions, though small openings in bearing walls might have minimal headers. Wall thickness sometimes indicates bearing status. Walls that seem unusually thick when you knock on them might contain larger framing for structural purposes. Investigating From the Attic Your attic reveals structural systems hidden in finished spaces below. Climb into your attic and observe how roof rafters or trusses connect to walls. Rafters sitting directly on walls and bearing down on them indicate those walls carry roof loads. Modern roof trusses - engineered triangulated systems - often span entire building widths without intermediate support. If you have trusses, interior walls below may not bear any roof load. However, some truss designs include bearing points at intermediate locations, so don't assume trusses eliminate all interior bearing walls. Older Rhode Island homes typically use traditional rafter framing where individual rafters span from exterior walls to a central ridge board. These systems often require bearing walls below to support ceiling joists and sometimes collar ties. Basement Clues Your basement structural system shows load paths from above. Steel or wood beams spanning across your basement typically support bearing walls directly above. Lally columns or other posts that support these beams indicate concentrated loads from walls above. Trace basement support beams upward through your house. If a wall on your first floor aligns with a basement beam, that wall likely continues the structural load path and is load-bearing. Foundation walls also carry loads from above. Walls sitting directly over foundation walls or within a foot or two often bear structural loads. When You Need a Structural Engineer Any wall removal project should involve professional evaluation, but structural engineers become absolutely essential when removing walls that bear loads. Never attempt to remove suspected load-bearing walls without engineering analysis. Structural engineers provide critical services for load-bearing wall removal projects. They definitively identify which walls bear loads through structural analysis of your home's framing system. They calculate required support beam sizes and specifications based on loads, spans, and building codes. They design proper support posts, footings, and connections ensuring safe load transfer. They produce stamped engineering drawings required for building permits in every Rhode Island municipality. They verify that your existing foundation can handle concentrated loads from new support beams. Engineering fees for residential load-bearing wall removal in Rhode Island typically range from $800 to $2,500 depending on project complexity, home size, and how many site visits are required. This represents excellent value considering the catastrophic consequences of structural failure. Some homeowners try to skip engineering to save money. This is extremely unwise and often impossible since Rhode Island building departments won't issue permits for structural modifications without stamped engineering drawings. The Load-Bearing Wall Removal Process Professional load-bearing wall removal follows a systematic process that maintains structural integrity throughout construction while creating your desired open space. Step 1: Engineering Analysis and Design Your structural engineer visits your home to measure existing framing, assess structural conditions, identify loads the wall currently supports, and determine appropriate replacement beam specifications. The engineer considers factors including span length between support points, loads from floors and roof above, existing foundation capacity, and local building code requirements. The engineer produces detailed drawings showing your home's existing structural system, the wall to be removed, specifications for the replacement support beam, required support posts or bearing points, connection details for beam-to-post and beam-to-existing-framing, temporary shoring requirements during construction, and foundation modifications if needed. This engineering process typically takes 2-4 weeks from initial site visit through completed stamped drawings. Don't rush this phase - thorough engineering prevents problems during construction and ensures your project gets permitted. Step 2: Obtaining Building Permits Every Rhode Island city and town requires building permits for load-bearing wall removal. Permit requirements include engineered structural drawings, detailed scope of work, contractor license information, and payment of permit fees. Providence requires permit applications through the Department of Inspection and Standards. The city reviews structural plans carefully and may request revisions before approval. Plan review typically takes 2-4 weeks for straightforward projects. Providence inspectors verify temporary support installation before allowing demolition, inspect replacement beam installation, and conduct final inspections before issuing certificates of occupancy. Warwick's Building Official processes permits with generally efficient timelines. Submit complete applications with engineered drawings and expect 2-3 week review periods. Warwick schedules inspections quickly once work is ready. Cranston, Pawtucket, East Providence, Woonsocket, and other Rhode Island cities have similar processes with varying timelines. Smaller towns including North Kingstown, South Kingstown, Coventry, Cumberland, Smithfield, Lincoln, Johnston, North Providence, Bristol, Warren, Barrington, Middletown, Portsmouth, Tiverton, Jamestown, Narragansett, Westerly, East Greenwich, and Charlestown each have local procedures, some with part-time building officials requiring advance appointment scheduling. Permit fees vary by municipality and project value, typically ranging from $200-800. Budget 3-6 weeks for the permitting process before construction begins. Step 3: Temporary Support Installation Before removing any load-bearing wall, contractors install temporary shoring that carries structural loads during construction. This critical step prevents structural damage, sagging, and failure while permanent support beams are installed. Temporary supports typically use adjustable steel posts or sturdy wood columns placed every 3-4 feet along the wall being removed. These posts support horizontal beams placed above and below, creating a temporary structural system that mimics the wall's load-bearing function. In two-story homes or when removing walls supporting heavy loads, temporary shoring may be required at multiple levels simultaneously. Your basement might need temporary posts, while the first floor requires additional shoring to support second-floor loads. Rhode Island building inspectors must verify temporary support adequacy before contractors can proceed with wall demolition. Never remove load-bearing walls before this inspection occurs and passes. Step 4: Wall Demolition and Hazardous Material Handling With proper temporary support installed and inspected, careful demolition begins. Contractors remove drywall or plaster to expose wall framing, cut and remove wall studs, address any mechanical systems in the wall cavity, and prepare for beam installation. Many Rhode Island homes built before 1980 contain asbestos in drywall joint compound, plaster, or other materials. Professional testing identifies asbestos before demolition starts. Licensed abatement contractors must remove asbestos-containing materials following strict Rhode Island Department of Environmental Management regulations. Older homes also contain lead paint requiring safe removal practices. Rhode Island's Lead Hazard Mitigation and Disclosure Act requires specific procedures for renovation work in pre-1978 homes. Contractors must contain work areas with plastic sheeting, use HEPA-filtered vacuums, and follow EPA's Renovation, Repair, and Painting Rule. Walls often contain electrical wiring, plumbing pipes, or HVAC ducts needing relocation. Licensed electricians and plumbers handle these systems, rerouting utilities around new structural elements or moving them to new locations entirely. Step 5: Support Beam Installation The replacement support beam carries all loads previously supported by the removed wall. Beam installation represents the most structurally critical phase of your entire project. Support beams come in several materials appropriate for different applications. Engineered lumber products like LVL (laminated veneer lumber) or PSL (parallel strand lumber) provide excellent strength in manageable sizes and weights. Steel I-beams offer maximum strength for long spans or heavy loads but require specialized installation and may need additional framing to accept ceiling finishes. Built-up wood beams using multiple 2x10s or 2x12s bolted together work well for shorter spans and blend naturally with traditional framing. Your structural engineer specifies exact beam type, size, and grade based on your specific loads and span. Never substitute different beams or sizes without engineering approval - seemingly small changes can compromise structural safety. Professional beam installation requires precision. The beam must be level, bear fully on all support points, connect properly to existing framing using engineer-specified hardware, and align exactly with approved engineering drawings. Rhode Island building inspectors verify beam installation matches engineered plans before allowing work to proceed. Inspectors check beam size and type, confirm proper connections and bearing, verify support post placement and sizing, and ensure everything aligns with stamped engineering drawings. Step 6: Support Posts and Foundation Work Load-bearing walls distribute weight along their entire length. Replacement beams concentrate those same loads at specific support points - usually the beam ends and sometimes at intermediate locations for long spans. These concentrated loads require adequate support extending down through your home to the foundation. Support posts carry beam loads to the foundation. Posts may be steel columns, engineered lumber, or built-up wood depending on loads and aesthetic preferences. Posts must align vertically through all floor levels, bearing on beams or bearing walls at each level down to the foundation. Foundation support for concentrated loads often requires upgrading. Existing foundation walls or footings may not be designed for point loads from new posts. Your engineer specifies foundation modifications which might include pouring new concrete footings under post locations, installing steel plates to distribute loads across existing foundations, adding support piers extending down to undisturbed soil, or reinforcing existing foundation walls. This foundation work sometimes requires excavation inside basements or crawl spaces - messy work but absolutely necessary for structural safety. Rhode Island's varied soil conditions mean foundation requirements differ significantly across the state. Coastal areas with sandy soils, Providence with mixed urban soils, and areas with ledge near the surface all require site-specific engineering. Step 7: Finishing Work With structural elements installed and inspected, finishing work creates your completed open space. Contractors patch and finish ceiling surfaces where the wall was removed, install new flooring to match across the opened area, blend wall surfaces at beam locations, paint or finish all new surfaces, and complete any trim work around posts or beams. Some homeowners box in support beams with drywall to create flush ceilings. Others expose beams as design features, wrapping them in wood trim or leaving steel beams visible for industrial aesthetics. Your finishing choices affect both cost and final appearance. Costs for Load-Bearing Wall Removal in Rhode Island Load-bearing wall removal costs vary significantly based on span length, structural requirements, home construction, and finish details. Understanding typical cost components helps you budget appropriately. For a typical single-story wall removal with an 8-12 foot span in a Rhode Island home, expect total costs of $4,000-8,000 including engineering, permits, structural work, and basic finishing. Projects removing walls with longer spans, supporting two-story loads, or requiring foundation work can easily cost $8,000-15,000 or more. Engineering fees run $800-2,500 for most residential projects. Building permits cost $200-800 depending on your municipality. The support beam itself costs $500-3,000 depending on material, length, and specifications. Support posts add $200-800 each depending on type and height. Foundation work when required costs $1,000-5,000 depending on scope. Labor for demolition, installation, and finishing typically runs $2,000-8,000 depending on project complexity. Hazardous material abatement adds significant costs if your Rhode Island home contains asbestos or lead paint. Asbestos abatement runs $1,500-5,000 for typical wall removal projects, while lead-safe work practices add $500-2,000 to labor costs. These costs assume straightforward residential work. Complications increase expenses - difficult basement access, multiple floor levels, complex roof framing, or historic home preservation requirements all drive costs higher. Common Mistakes to Avoid Rhode Island homeowners attempting load-bearing wall removal sometimes make costly mistakes. Learning from others' errors helps you avoid problems. Never remove walls without professional engineering evaluation. Some homeowners try to identify bearing walls themselves and proceed without engineering. This risks structural failure and creates permit problems since no Rhode Island municipality will approve structural work without stamped engineering plans. Don't skip building permits to save money or time. Unpermitted structural work creates serious problems when selling your home, may void your homeowner's insurance if problems occur, violates Rhode Island building codes and can result in fines, and could require expensive removal or remediation to obtain permits retroactively. Avoid choosing contractors based solely on low price. Structural work requires expertise and precision. Unqualified contractors make mistakes that compromise your home's structural integrity, may not carry adequate insurance if problems occur, often don't understand permitting and inspection requirements, and sometimes disappear if projects go wrong. Don't underestimate project timelines. Load-bearing wall removal isn't a weekend project. Plan for 6-10 weeks total from initial engineering through final inspection including 2-4 weeks for engineering, 3-6 weeks for permitting, and 1-2 weeks for construction and inspections. Never rush foundation work or skip foundation evaluation. Concentrated loads from replacement beams can overwhelm existing foundations. Foundation failures cause severe structural damage far exceeding the cost of proper foundation work upfront. Working with Rhode Island Contractors Successful load-bearing wall removal requires experienced contractors familiar with structural work and local permitting requirements. Look for contractors with specific load-bearing wall removal experience. Ask for references from previous similar projects and actually contact those references. Verify the contractor holds current Rhode Island contractor registration through the Contractor Registration and Licensing Board. Confirm adequate insurance including general liability and workers compensation coverage. Get detailed written proposals specifying complete scope of work, beam specifications matching engineering plans, timeline with key milestones, payment schedule tied to work completion, permit responsibilities and costs, and warranty terms for labor and materials. Expect professional contractors to pull all required permits, coordinate engineering and permitting, install adequate temporary support, schedule and pass all inspections, complete work according to engineered plans, and deliver finished results meeting code requirements. Rockhouse Construction is ready to help. Contact us today .
By David Antonucci February 2, 2026
Rhode Island's 400 miles of coastline create extraordinary living opportunities and significant basement flooding challenges. If you own property in coastal Rhode Island communities like Narragansett, Newport, Westerly, Portsmouth, Middletown, Tiverton, Barrington, Bristol, or even inland areas near Narragansett Bay, you've likely dealt with or worried about basement flooding from coastal storms, high tides, and rising sea levels. Coastal flooding differs fundamentally from typical groundwater seepage or storm runoff. It brings saltwater intrusion, storm surge, and unprecedented water volumes that overwhelm conventional drainage systems. This guide covers everything Rhode Island coastal property owners need to know about protecting basements from flooding, from understanding your risks to implementing effective solutions. Understanding Coastal Flooding Risks in Rhode Island Rhode Island faces unique coastal flooding challenges that intensify each year. The state experiences some of the highest rates of relative sea level rise in the nation - approximately 10 inches since 1930, with projections suggesting another 3-9 feet by 2100 depending on emissions scenarios. Where Coastal Flooding Hits Hardest Coastal flooding impacts Rhode Island communities differently based on geography, elevation, and proximity to water bodies. Narragansett Bay Communities Properties along Narragansett Bay face flooding from multiple directions. Newport, Barrington, Bristol, Warren, and East Greenwich experience regular tidal flooding during astronomical high tides combined with nor'easters or tropical systems. The bay's funnel shape amplifies storm surge, pushing extraordinary water volumes into communities at the bay's upper reaches. Providence's hurricane barrier protects downtown, but surrounding neighborhoods and the East Bay communities lack similar protection. Ocean-Facing Properties Narragansett, Westerly, South Kingstown, and Charlestown face direct Atlantic exposure. These communities experience the full force of coastal storms, with wave action compounding flooding impacts. Watch Hill in Westerly and areas of Narragansett's coastline see dramatic storm surge during hurricanes and major nor'easters. Properties here deal with both flooding and severe erosion that can undermine foundations. Island Communities Block Island faces unique challenges from its exposed position 12 miles offshore. The island experiences flooding from all directions during storms, with limited options for water drainage. Aquidneck Island communities - Newport, Middltown, and Portsmouth - combine bay and ocean exposure. Low-lying areas flood regularly, particularly in Newport's historic waterfront neighborhoods and Portsmouth's western shore. How Coastal Flooding Affects Basements Coastal flooding creates basement water intrusion through multiple pathways that differ from typical basement moisture problems. Storm Surge and Tidal Flooding Storm surge occurs when hurricane or nor'easter winds push ocean water toward shore, creating temporary sea level increases of 5-15 feet above normal high tide. This surge: Overwhelms basement walls through hydrostatic pressure Forces water through foundation cracks and joints Backs up through sewer systems and floor drains Floods window wells and basement egress points Even without direct surge impact, elevated water tables during coastal flooding saturate soil around foundations, creating intense pressure that forces water through any available opening. Saltwater Intrusion Unlike freshwater flooding, coastal events bring corrosive saltwater that damages building materials and mechanical systems. Saltwater: Accelerates concrete deterioration and rebar corrosion Damages electrical systems beyond repair Ruins HVAC equipment, water heaters, and appliances Leaves persistent salt deposits that attract moisture Kills lawns and landscaping around your foundation A single saltwater flooding event can cause more damage than years of freshwater seepage. Sewer Backups Many Rhode Island coastal communities use combined sewer systems that handle both sewage and stormwater. During coastal flooding: Storm surge overwhelms sewer capacity Seawater backs up through floor drains into basements Raw sewage mixes with floodwater Contaminated water creates health hazards Warwick, Providence, Pawtucket, and Newport all have combined sewer areas vulnerable to backups during coastal flooding. Assessing Your Coastal Flooding Risk Understanding your specific risk helps you prioritize protective measures and make informed decisions about basement use and improvements. Check FEMA Flood Maps FEMA flood maps identify properties in Special Flood Hazard Areas (SFHAs) where flooding has a 1% or greater annual chance - the so-called 100-year flood zone. Rhode Island coastal properties fall into various flood zones: High-Risk Zones: VE Zone: Coastal areas with velocity hazard (wave action) AE Zone: Coastal or riverine areas with base flood elevations determined A Zone: Flood hazard areas without base flood elevations Moderate to Low Risk: X (shaded): 0.2% annual chance (500-year flood zone) X (unshaded): Minimal flood risk However, FEMA maps use historical data and may underestimate future risk given accelerating sea level rise. Properties currently outside flood zones increasingly experience flooding during extreme high tides and storms. Access current flood maps through FEMA's Map Service Center or Rhode Island's Coastal Resources Management Council (CRMC) StormTools, which provides sea level rise and storm surge visualization for Rhode Island coastlines. Understand Your Property's Elevation Elevation relative to mean higher high water (MHHW) determines your flooding vulnerability. Properties within 2-3 feet of MHHW face regular tidal flooding even without storms. Rhode Island requires elevation certificates for properties in flood zones. If you don't have one, licensed surveyors can provide certificates showing your lowest floor elevation relative to base flood elevation (BFE). Review Historical Flooding Your property's flood history offers valuable risk insight. Ask previous owners, check disclosure documents, and talk with long-time neighbors about past flooding events. The 1938 Hurricane, Hurricane Carol (1954), Hurricane Bob (1991), and the October 2010 flood serve as benchmarks. If your basement flooded during these events, assume it will flood again. Immediate Actions During Coastal Flooding When coastal flooding threatens, taking prompt action protects your property and ensures safety. Monitor Warnings and Forecasts Rhode Island Emergency Management Agency (RIEMA) and the National Weather Service issue coastal flood warnings 12-36 hours before expected flooding. Sign up for emergency alerts through your municipality's notification system. Watch for: Coastal flood warnings and watches Storm surge predictions Astronomical high tide timing Nor'easter or tropical system tracks Flooding risk peaks when storm surge coincides with astronomical high tides. The combination can produce water levels several feet higher than either factor alone. Secure Your Basement Before Flooding If flooding seems likely and you have several hours warning: Move valuable items from basement to upper floors Elevate or relocate appliances and mechanicals if possible Shut off electricity to basement at the breaker panel Close basement vents and windows Install flood panels or barriers if you have them Move vehicles to higher ground Photograph basement and contents for insurance documentation Never stay in basements during coastal flooding. Rising water can trap occupants, and electrical hazards create life-threatening risks. Stay Safe During the Event Coastal flooding creates dangerous conditions: Never walk or drive through floodwater - six inches can knock you down, one foot can float vehicles Avoid contact with floodwater, which may contain sewage, chemicals, and debris Don't use electrical equipment while standing in water Evacuate if authorities order it - don't wait until escape routes flood Rhode Island coastal communities have designated evacuation routes and shelters. Know your routes before emergencies occur. Long-Term Solutions for Coastal Basement Flooding Protecting basements from recurring coastal flooding requires comprehensive approaches combining multiple strategies. Exterior Waterproofing and Drainage Proper exterior drainage diverts surface water away from foundations and reduces hydrostatic pressure during flooding events. Foundation Waterproofing Excavating around your foundation allows application of waterproof membranes that prevent water intrusion: Remove soil from foundation walls to footer level Clean and repair foundation cracks and defects Apply rubberized or polymer-modified waterproofing membrane Install drainage board to channel water to footer drains Backfill with free-draining gravel near walls Full perimeter waterproofing costs $8,000-15,000 for typical Rhode Island homes but provides the most reliable protection against hydrostatic pressure. French Drains and Curtain Drains French drains installed around your foundation collect groundwater before it reaches basement walls: Dig trenches around foundation perimeter Install perforated pipe in gravel bed Wrap pipe and gravel in filter fabric Slope pipe toward daylight drainage or sump basin Ensure positive drainage away from house French drains cost $3,000-8,000 depending on perimeter length and drainage challenges. In coastal areas, connect drains to pumped systems since gravity drainage often isn't possible at sea level. Sump Pump Systems Sump pumps remove water that accumulates around and under basement floors. Coastal properties need robust systems designed for high-volume, frequent operation. Primary Sump Pumps Quality primary pumps should provide: 1/2 to 3/4 horsepower motors for adequate capacity Cast iron construction for durability Automatic float switches for hands-free operation Alarm systems indicating pump failure or high water Expect to spend $800-2,000 for professional sump pump installation including basin, pump, and discharge piping. Battery Backup Systems Coastal flooding often causes power outages precisely when you need pumps most. Battery backup systems maintain pumping during outages: Deep-cycle marine batteries provide 6-12 hours backup runtime Automatic switching activates backup when power fails Separate backup pump or power for primary pump Battery charging systems maintain readiness Battery backup sump systems cost $600-1,500 installed. Some Rhode Island homeowners invest in whole-house generators ($8,000-15,000) for extended backup power during multi-day coastal storm events. Water-Powered Backup Pumps Properties with adequate municipal water pressure can use water-powered backup pumps. These devices: Use venturi effect to pump water without electricity Require no batteries or fuel Work indefinitely during power outages Pump slower than electric pumps but provide crucial backup Water-powered pumps cost $300-800 installed but only work where water pressure exceeds 40 PSI and local codes permit them. Backwater Valves Backwater valves prevent sewer backups during coastal flooding when storm surge overwhelms municipal systems. These one-way valves: Install in main sewer line before it exits your house Allow water to flow out but prevent backflow Close automatically when reverse pressure occurs Protect against sewage contamination Professional backwater valve installation costs $500-2,000 depending on accessibility and plumbing configuration. Some Rhode Island municipalities offer rebates for backwater valve installation. Flood Vents and Openings For properties in FEMA flood zones, building codes require flood vents in foundation walls to equalize hydrostatic pressure and prevent structural collapse during flooding. Engineered flood vents: Automatically open when floodwater reaches them Allow water to flow through foundation walls Prevent differential pressure that cracks foundations Close automatically as water recedes Flood vents cost $150-400 each installed. FEMA requires one square inch of vent area per square foot of enclosed space, typically requiring 4-8 vents for standard basements. While flood vents allow controlled flooding, they prevent far worse structural damage from unequalized pressure. Elevation and Structural Solutions For properties facing severe, recurring coastal flooding, elevation or structural modifications offer more permanent solutions. Basement Abandonment Some Rhode Island coastal homeowners choose to abandon basement living space: Remove mechanicals to upper floors Eliminate finished living areas in basements Use basements only for flood-tolerant storage Install flood vents for pressure equalization This approach accepts occasional flooding while protecting valuable systems and avoiding constant flood fighting. House Elevation Elevating your entire house above base flood elevation provides maximum flood protection: House lifted on hydraulic jacks New foundation built to required height House lowered onto elevated foundation Utilities reconnected at new elevation House elevation costs $100,000-300,000+ for Rhode Island homes depending on size and complexity. However, FEMA mitigation grants can cover 75% of costs for qualifying properties with repetitive losses. Dry Floodproofing Dry floodproofing makes basements watertight to prevent water intrusion during flooding. This approach requires: Completely waterproofed foundation walls and floor Sealable doors, windows, and other openings Sewer backflow prevention Structural reinforcement to withstand hydrostatic pressure Dry floodproofing costs $15,000-40,000 for typical basements but only works for shallow flooding (2-3 feet maximum). Deeper flooding creates excessive pressure that overwhelms waterproofing systems. FEMA generally doesn't recommend dry floodproofing for residential basements due to reliability concerns during extreme events. Basement Recovery After Coastal Flooding When coastal flooding occurs despite protective measures, proper cleanup prevents long-term damage and health hazards. Safety First Flooded basements pose serious hazards: Don't enter until utilities are confirmed safe Wear protective gear including boots, gloves, and respirator Assume all floodwater is contaminated Watch for structural damage before entering Contact licensed electricians to inspect systems before restoring power to flooded areas. Document Everything Before cleanup begins: Photograph and video all damage thoroughly Document water levels with markers or measurements List damaged items with approximate values Save damaged items until insurance adjusters review claims Rhode Island requires prompt notification to insurers - typically within 72 hours of discovering damage. Remove Water and Dry Out Remove standing water as quickly as safely possible: Use pumps or wet vacuums to remove bulk water Open windows and doors for ventilation (weather permitting) Run dehumidifiers to reduce moisture levels Use fans to circulate air and accelerate drying Remove wet insulation, drywall, and carpeting Aim to dry basements within 48 hours to prevent mold growth. Saltwater flooding requires more aggressive drying since salt attracts moisture indefinitely. Clean and Disinfect Coastal floodwater contains bacteria, sewage, chemicals, and other contaminants requiring thorough cleaning: Remove all mud and debris Scrub all surfaces with detergent and water Disinfect with bleach solution (1 cup bleach per gallon water) Rinse thoroughly after disinfecting Allow complete drying before rebuilding Discard porous materials that contacted floodwater - drywall, insulation, carpeting, and upholstered furniture cannot be adequately cleaned after sewage-contaminated flooding. Address Saltwater Damage Saltwater leaves corrosive residue requiring special attention: Flush concrete with fresh water multiple times Wire brush salt deposits from surfaces Apply salt-neutralizing products to concrete and masonry Replace any corroded metal components Consider sealing concrete to prevent salt wicking Incomplete salt removal causes ongoing moisture problems and continued corrosion. Insurance Considerations for Coastal Properties Understanding insurance coverage before flooding occurs prevents financial disasters. Flood Insurance Requirements Standard homeowners insurance doesn't cover flood damage. Properties in FEMA flood zones with federally-backed mortgages must carry flood insurance. However, many Rhode Island coastal properties outside mapped flood zones also flood regularly. Smart homeowners carry flood insurance regardless of requirements. National Flood Insurance Program (NFIP) policies: Cover up to $250,000 for structure, $100,000 for contents Require 30-day waiting period before coverage begins Cost $400-3,000+ annually depending on flood zone and elevation Cover actual cash value, not replacement cost Private flood insurance increasingly offers alternatives to NFIP with higher coverage limits and sometimes better pricing for lower-risk properties. Repetitive Loss Properties Properties with multiple flood insurance claims become "repetitive loss" or "severe repetitive loss" properties. This designation: Increases premiums substantially May make properties difficult to sell Qualifies for FEMA mitigation grants Signals need for serious flood protection improvements Rhode Island has hundreds of repetitive loss properties, many in coastal communities experiencing increased flooding from sea level rise. Working with Rhode Island Coastal Regulations Coastal property improvements must comply with Rhode Island Coastal Resources Management Council (CRMC) regulations and local building codes. CRMC Permitting CRMC regulates construction in coastal areas. Projects requiring permits include: Excavation or grading near coastlines Seawalls, revetments, and other shoreline structures Substantial improvements to properties in coastal zones Any work in coastal wetlands or buffers CRMC application processes take 60-120 days. Some projects require public hearings and environmental assessments. Municipal Requirements Each Rhode Island coastal community has building codes addressing flood protection: Minimum elevation requirements for new construction and substantial improvements Flood-resistant materials specifications below base flood elevation Floodproofing standards for non-residential buildings Anchor and foundation requirements in flood zones Narragansett, Newport, Westerly, and other coastal towns employ floodplain managers who can explain local requirements. Future-Proofing Against Rising Seas Rhode Island's coastal flooding will worsen as seas rise. Smart property owners plan for future conditions, not just today's risks. Consider Managed Retreat Some Rhode Island coastal areas will become untenable within decades. If your property faces severe, worsening flooding: Consider selling before flood damage reduces property value Explore FEMA buyout programs for repetitive loss properties Plan exit strategies for properties likely to flood frequently Managed retreat proves emotionally difficult but financially prudent for the most vulnerable properties. Invest in Resilient Infrastructure Properties you plan to keep long-term need resilient improvements: Elevate critical mechanicals above projected flood levels Use flood-resistant materials throughout basements Design for easy cleanup after flooding events Maintain robust drainage and pumping systems Building resilience costs more upfront but reduces flood damage and recovery costs over time. Community-Level Solutions Individual property protection works best when combined with community-wide flood management. Green Infrastructure Communities throughout Rhode Island are implementing green infrastructure that reduces flooding: Rain gardens and bioswales that absorb stormwater Permeable pavement allowing water infiltration Restored wetlands that buffer storm surge Living shorelines replacing hardened seawalls Warwick, Providence, and Newport have active green infrastructure programs. Support these initiatives that benefit entire communities. Hurricane Barriers and Seawalls Large-scale barriers protect multiple properties: Providence's Fox Point Hurricane Barrier protects downtown Proposed barriers could protect vulnerable Rhode Island communities Living shorelines provide erosion protection with environmental benefits These projects require federal funding and long timelines but offer community-wide protection impossible through individual actions. Rockhouse Construction is ready to help. Contact us today .